Blog

  • How to Transport Your Dirt Bike Safely

    How to Transport Your Dirt Bike Safely

    How to Transport Your Dirt Bike Safely

    Transporting a dirt bike safely is essential to ensure its condition remains intact while avoiding any potential accidents on the road. Whether you’re heading to a race, trail, or riding spot, understanding the best practices for loading, securing, and hauling your dirt bike will make the experience smoother and more enjoyable. This guide offers key recommendations to help you navigate the transport process with confidence.

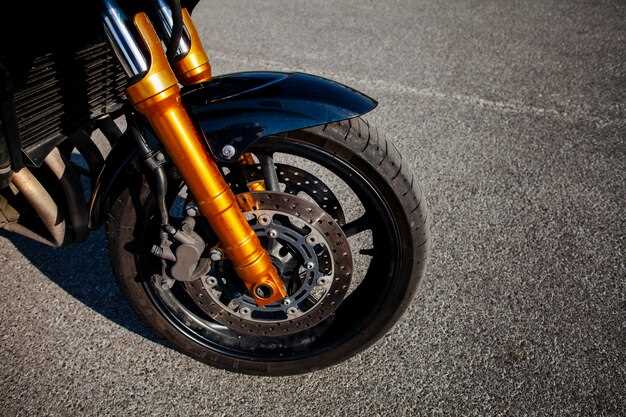
    Before hitting the road, it is crucial to prepare your dirt bike properly. Start by performing a thorough inspection to confirm that everything is in working order, including the brakes, tires, and fluids. This step is not only important for the bike’s performance but also for ensuring your safety while transporting. Additionally, familiarize yourself with local laws regarding the transport of off-road vehicles, as regulations can vary from place to place.

    When it comes to loading your dirt bike, using a steep ramp can help you maneuver it safely onto your truck or trailer. Always ensure that your loading area is firm and level to minimize the risk of slipping. Once the bike is loaded, take time to secure it properly using high-quality tie-down straps. Tightening these straps correctly is crucial–make sure the bike cannot shift or tip during transport. In this article, we will explore the specific techniques and tools that will keep your bike secure and protect it from damage.

    Secure Your Dirt Bike Properly in the Vehicle

    Securing your dirt bike during transport is crucial to prevent damage and ensure safety on the road. Begin by choosing the right vehicle; a truck or trailer specifically designed for dirt bikes is ideal. Ensure that the vehicle has a flat surface and sufficient space to accommodate your bike without forcing it.

    Use high-quality tie-down straps to anchor your dirt bike. Ratchet straps are preferred due to their strength and ability to maintain tension. Attach one end of the strap to the handlebars and the other to the vehicle’s tie-down points. Make sure to secure both the front and rear of the bike to minimize movement during transit.

    Additionally, consider using wheel chocks to keep the wheels in place. Placing chocks under the front and rear wheels helps prevent any unintended rolling or shifting. If possible, position the bike upright, as this maximizes its stability during travel.

    To further protect your bike, especially if you’re transporting multiple units, use soft padding or blankets around the frame and vulnerable parts to prevent scratches and dings from contact with other bikes or the vehicle itself.

    Before hitting the road, double-check that all straps are tight and secure. Conduct a quick inspection of your bike to ensure nothing is loose that may cause damage while transporting. Taking these precautions will help ensure a safe journey for both you and your dirt bike.

    Choose the Right Transport Vehicle for Your Dirt Bike

    Selecting the appropriate vehicle for transporting your dirt bike is crucial for ensuring its safety and securing a smooth journey. Various options cater to different needs and preferences, each with specific advantages and disadvantages.

    Vehicle Type Pros Cons
    Pickup Truck – Easy loading and unloading
    – Open bed for larger space
    – Good visibility
    – Exposure to weather elements
    – Risk of theft if not secured
    Trailer – Increased capacity for multiple bikes
    – Offers protection from weather
    – Can be fitted with storage options
    – Requires a suitable towing vehicle
    – More complex setup and maneuvering
    VAN – Enclosed space protects from elements
    – Enhanced security
    – Room for additional gear
    – Limited space if multiple bikes are loaded
    – May require ramps for loading
    Motorcycle Hauler – Designed specifically for transporting bikes
    – Easy to secure bikes with built-in fixtures
    – Compact and often lightweight
    – May not accommodate larger bikes
    – Limited storage for extra gear

    Consider the type and size of your dirt bike, as well as the distance you plan to travel, when choosing your transport vehicle. A pickup truck might suffice for shorter trips, while a trailer or van may be better for longer journeys or when transporting multiple bikes. Always prioritize securing the bike properly, using appropriate straps or tie-downs, regardless of the vehicle type.

    Additionally, ensure that your chosen vehicle has the necessary towing capacity or space to handle your dirt bike without risking damage during transport. Regular maintenance and inspections of your transport vehicle are also essential for a successful trip.

    Prevent Damage with Proper Strapping Techniques

    Transporting your dirt bike requires careful attention to how it is secured. Proper strapping techniques can prevent unnecessary damage to your bike during transit. Here are key steps to ensure your dirt bike remains safe and undamaged:

    1. Choose the Right Straps:

      Select high-quality, ratchet or cam buckle tie-downs specifically designed for securing motorcycles. Avoid using regular rope or bungee cords, as they may not hold securely.

    2. Position the Bike Correctly:

      Ensure your dirt bike is placed upright and not leaning to one side. Use a wheel chock if available, to keep the front wheel steady.

    3. Secure the Front and Rear:

      Attach straps to both the front and rear of the bike. This balances the weight distribution and prevents tipping.

    When strapping the bike down, follow these specific techniques:

    • Strap Placement:

      Attach the straps to the frame or other sturdy parts of the bike, avoiding fragile areas such as brake lines or plastics.

    • Tightening the Straps:

      Gradually tighten the straps while ensuring that the bike remains upright. Do not over-tighten, as this can cause stress and damage to the suspension.

    • Check for Movement:

      After securing, gently shake the bike to ensure it doesn’t move. Adjust straps if necessary.

    Regularly inspect the straps during transit for any signs of wear or loosening. Proper strapping techniques are crucial in ensuring your dirt bike arrives at your destination in pristine condition, ready for the next adventure.

    Check Local Laws and Regulations for Transporting Dirt Bikes

    Check Local Laws and Regulations for Transporting Dirt Bikes

    Before transporting your dirt bike, it’s essential to familiarize yourself with local laws and regulations that govern the transportation of off-road vehicles. Each state or region may have specific requirements regarding the legal transport of dirt bikes, including whether they can be driven on public roads or specific routes.

    Start by checking your state’s Department of Motor Vehicles (DMV) or equivalent agency for any licensing requirements. Some areas may require a special permit for transporting dirt bikes on public roads, while others may have designated routes where such vehicles are allowed.

    Additionally, make sure to review any regulations regarding the use of trailers. Certain jurisdictions may have restrictions on trailer size, weight limits, or safety equipment. Ensure your trailer is equipped with adequate lights and reflectors as stipulated by your local regulations.

    Be aware of any noise ordinances in your area, as many communities enforce limits on the sound produced by dirt bikes. Using a quieter exhaust system may be necessary to comply with local laws.

    Lastly, check if your region has specific insurance requirements for transporting off-road vehicles. Some states may mandate insurance coverage that extends to not just riding but also transportation-related incidents.

    Adhering to these laws not only ensures your safety but also helps avoid penalties, making your transport experience smoother and more enjoyable.

    Use Protective Gear and Covers During Transport

    Transporting your dirt bike carries risks that can lead to damage if not properly managed. Utilizing protective gear and covers is crucial to safeguard your bike against potential hazards during transit. One of the most effective ways to protect your dirt bike is by using customized transport covers designed specifically for your model. These covers provide a barrier against dust, moisture, and minor impacts.

    In addition to covers, securing the bike properly with straps and padding is essential. Use soft tie-downs to avoid scratching the frame or bodywork. Make sure to cover vulnerable areas, such as the handlebars and footpegs, with padding to prevent them from coming into contact with other items or the vehicle’s interior during the journey.

    Don’t forget about the importance of using wheel chocks or center stands to prevent movement. This adds extra stability and minimizes the risk of the bike tipping over. If possible, transport your bike in an upright position to reduce strain on the suspension and prevent oil from leaking from the engine.

    Finally, inspect your protective gear and covers regularly. Look for wear and tear that could compromise their effectiveness during transport. By taking these precautions, you enhance the safety of your dirt bike and ensure it arrives at your destination in optimal condition.

    Inspect Your Bike Before and After Transporting

    Inspecting your dirt bike both before and after transport is essential to ensure its safety and performance. This thorough examination helps to identify any potential issues that could lead to damage during transit or affect your ride once you reach your destination.

    Here are the key steps to follow:

    1. Check Fluid Levels:

      • Ensure your fuel tank is filled adequately but not overflowing.
      • Check that oil levels are sufficient and look for any leaks that may develop during transport.
      • Inspect coolant levels to prevent overheating issues after transport.
    2. Inspect Tires:

      • Examine tire pressure to confirm they are inflated to the recommended levels.
      • Look for any signs of wear or damage, such as cracks or punctures.
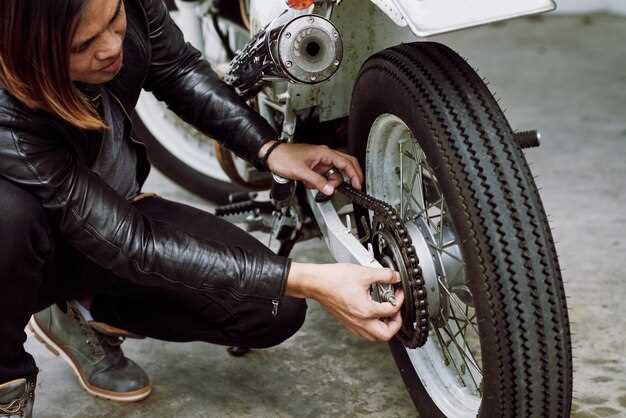
    3. Secure All Components:

      • Make sure that all bolts and screws are tightened, particularly those on the handlebars and suspension.
      • Check that your chain is properly lubricated and tensioned.
      • Ensure that your footpegs and other removable accessories are securely attached.
    4. Inspect Controls:

      • Test the throttle and brake levers to confirm they are functioning smoothly.
      • Check the clutch to ensure it engages and disengages without sticking.
    5. Review Safety Features:

      • Ensure that all lights and signals are operational.
      • Inspect the kill switch and make sure it is functioning as expected.

    After transporting your dirt bike, it is equally important to conduct a post-transport inspection. This will help you identify any damages that may have occurred during the journey.

    Follow these steps for a thorough post-transport inspection:

    1. Check for any noticeable scratches or dents on the frame and body.
    2. Inspect components like the suspension and handlebars for any misalignment.
    3. Look for signs of oil or fluid leaks that may have developed during transport.
    4. Test the brakes and throttle once more to ensure they are still working properly.

    By consistently following these inspection routines before and after transporting your dirt bike, you ensure its safety and longevity, allowing you to enjoy your rides without worries.

  • Top Riding Jackets for All-Weather Protection

    Top Riding Jackets for All-Weather Protection

    Top Riding Jackets for All-Weather Protection

    Choosing the right riding jacket is essential for every motorcyclist, whether you’re a daily commuter or an adventure seeker. The ideal jacket not only provides protection from the elements but also enhances comfort during long rides. With an overwhelming variety of options available, it’s crucial to understand what features to prioritize for optimal performance in all weather conditions.

    Weather-resistance is the foremost attribute to consider. A high-quality riding jacket should be constructed from materials that offer both waterproofing and breathability. This ensures that riders remain dry during unexpected showers while still allowing moisture from perspiration to escape. Additionally, thermal insulation can be beneficial for colder climates, ensuring warmth without compromising mobility or comfort.

    Furthermore, the importance of visibility and safety cannot be overstated. Many jackets come equipped with reflective strips or bright colors that enhance visibility in low-light situations. Protection features, such as armor in key areas like shoulders and elbows, are also critical for reducing the risk of injury during an accident. By selecting a jacket that balances safety, comfort, and style, riders can enjoy a more pleasant and secure journey regardless of the weather conditions.

    Choosing Materials for Maximum Weather Resistance

    When selecting a riding jacket, the choice of materials is crucial for ensuring optimal weather resistance. Various fabrics offer different benefits and protection against the elements, such as rain, wind, and extreme temperatures.

    One of the best materials for all-weather riding jackets is GORE-TEX. This fabric is known for its excellent waterproofing capabilities while remaining breathable, allowing moisture from sweat to escape. This feature keeps the rider dry and comfortable, even during prolonged wearing.

    Another popular option is nylon, particularly high-denier nylon, which provides a balance of durability and lightweight performance. Nylon jackets are often treated with water-resistant coatings to enhance their protection against water ingress, making them suitable for wet conditions.

    Leather is a classic choice for riding jackets, offering natural resistance to wind and water. However, it can become saturated in heavy rain unless treated with a waterproofing agent. Leather also provides superior abrasion resistance for added safety in the event of a fall.

    For insulation, materials such as Thinsulate or fleece are effective in retaining body heat without adding significant bulk. These materials trap warmth while still allowing breathability, ensuring comfort during colder rides.

    Reflective materials are another important consideration for visibility in various weather conditions. Jackets that incorporate reflective elements enhance safety during low-light situations, such as fog or heavy rain, allowing others to see the rider more easily.

    In summary, the best riding jackets for all-weather protection utilize a combination of advanced materials such as GORE-TEX, high-denier nylon, treated leather, insulating fabrics, and reflective elements. Evaluating these materials will help riders choose a jacket that offers maximum weather resistance while maintaining comfort on the road.

    Understanding the Importance of Breathability in Riding Jackets

    When selecting a riding jacket, breathability is a crucial feature that significantly impacts comfort, performance, and overall riding experience. Breathable materials allow moisture produced by the body to escape, preventing sweat accumulation while also providing protection against the elements.

    Here are several key points to consider regarding the breathability of riding jackets:

    • Temperature Regulation: Breathable fabrics help maintain a comfortable body temperature. When riding, the body generates heat, especially in warm conditions. A jacket with good breathability helps regulate this heat, preventing overheating.
    • Moisture Management: Breathable materials wick away sweat from the skin, promoting evaporation. This process keeps riders dry and comfortable, reducing the risk of chafing or discomfort during long rides.
    • Versatility: Riding jackets with breathable properties are suitable for various weather conditions. They often incorporate features like ventilation openings that can be adjusted based on the temperature, making them ideal for both warm and cool climates.
    • Layering Options: Breathable jackets work well with layering systems. When combined with moisture-wicking base layers, they enhance the overall effectiveness in regulating body temperature and providing comfort during different riding scenarios.
    • Safety Considerations: Many breathable riding jackets employ advanced materials that not only allow for airflow but also maintain protective qualities. This ensures that riders remain safe while enjoying comfort on the road.

    In summary, choosing a riding jacket with proper breathability is essential for ensuring an enjoyable and safe riding experience. Riders should prioritize this feature to enhance comfort, manage moisture, and adapt to varying weather conditions effectively.

    Identifying Key Features for Cold Weather Riding

    Identifying Key Features for Cold Weather Riding

    When riding in cold weather, it is essential to choose a jacket that offers the right combination of insulation, waterproofing, and comfort. Here are the key features to consider:

    Feature Description
    Insulation A good cold weather riding jacket should have high-quality insulation like Thinsulate or down to keep body heat trapped without adding bulk.
    Water Resistance Look for jackets with waterproof membranes such as Gore-Tex or other breathable fabrics that prevent water from penetrating while allowing sweat to escape.
    Windproof Design Jackets should feature windproof materials and closures, reducing the chilling effect of cold winds during rides.
    Layering Capability Select jackets with adequate room for layering underneath, which allows for adaptability based on temperature and riding duration.
    Comfort Fit A comfortable fit with adjustable cuffs, collars, and hems ensures proper coverage and minimizes cold air infiltration.
    Reflective Elements Visibility is crucial in low-light conditions; jackets should have reflective strips or panels to enhance safety.
    Pockets and Storage Conveniently placed pockets for essentials like wallets, phones, or keys enhance usability without compromising comfort.
    Removable Linings Some jackets feature removable thermal linings, allowing for customization according to varying weather conditions.

    Choosing a riding jacket with these key features ensures both protection and comfort, making cold weather rides more enjoyable.

    Selecting Appropriate Ventilation Systems for Warm Conditions

    When choosing a riding jacket designed for warm conditions, the ventilation system plays a crucial role in maintaining comfort and preventing overheating. Effective ventilation allows for airflow that helps regulate body temperature, even during prolonged rides in high temperatures.

    Look for jackets that feature strategically placed vents. These should be located in areas where airflow naturally occurs, such as the chest, back, and underarms. Zippered vents offer flexibility, allowing riders to open or close them depending on the temperature and speed of riding. Additionally, mesh panels can enhance airflow without compromising safety, providing a lightweight option for summer rides.

    Integrated moisture-wicking linings can complement ventilation systems by managing sweat, helping to keep the rider dry and comfortable. Fabrics that allow for breathability are essential; look for jackets made from textiles like Cordura or other nylon blends that are known for their durability while still offering adequate air circulation.

    Adjustability is also key. Jackets that offer adjustable cuffs, collars, and hemlines can help control airflow while preventing excess wind from entering the jacket at high speeds. Furthermore, consider options that allow for layering. A ventilated jacket can often be combined with a thermal base layer for cooler mornings or evenings, making it a versatile choice for varying temperatures.

    Lastly, test the jacket in similar warm conditions if possible. A comfortable fit with a well-optimized ventilation system will enhance your riding experience considerably. Prioritize jackets that combine these features to ensure maximum protection and comfort during hot weather rides.

    Evaluating Fit and Comfort for Extended Riding Sessions

    When selecting a riding jacket for long-duration rides, the fit is paramount to ensuring maximum comfort and mobility. A well-fitting jacket should allow for a full range of motion without being overly loose, which can lead to fatigue and distraction. Look for jackets that offer adjustable features such as waist cinches, cuffs, and collars, allowing you to customize the fit according to your body type and riding posture.

    Comfort during extended riding sessions is also significantly influenced by the jacket’s materials. Lightweight, breathable fabrics enhance airflow, preventing overheating while maintaining insulation during colder conditions. Consider jackets with moisture-wicking liners that draw sweat away from the body, keeping you dry and comfortable, even on longer journeys.

    Layering capabilities must also be considered when evaluating comfort. A riding jacket that accommodates layering allows you to adjust based on changing weather conditions. The ability to add or remove insulating layers ensures that you can maintain an ideal body temperature throughout your ride.

    Furthermore, an ergonomic design is essential. Look for jackets with pre-curved sleeves and a dropped back to match the natural riding position. Such designs help reduce strain on your back and arms, ultimately improving comfort during lengthy rides. Additionally, consider jackets with soft, padded areas at pressure points; this feature minimizes discomfort caused by prolonged contact with the bike.

    Lastly, test the jacket while wearing riding gear, such as gloves and a helmet, to ensure that it fits well in conjunction with all your equipment. This holistic approach to evaluating fit and comfort will aid in choosing a jacket that not only protects but also enhances your riding experience during extended sessions.

    Top Brands and Models Recommended by Experienced Riders

    When it comes to choosing the best riding jackets for all-weather protection and comfort, seasoned riders often recommend several brands and models based on their durability, functionality, and style. Here are the top brands and some of their most acclaimed models that have earned the trust of experienced riders.

    1. Alpinestars is known for its high-quality gear that combines safety with sporty aesthetics. The Alpinestars Andes v3 Drystar jacket is a popular choice, featuring a waterproof shell and thermal liner, making it suitable for various weather conditions while providing ample ventilation for warm days.

    2. Rev’It! offers a range of versatile riding jackets designed for both adventure and urban commuting. The Rev’It! Sand 3 jacket stands out for its incredible adaptability. It is equipped with removable liners and airflow systems, ensuring comfort in different climates while maintaining a rugged look.

    3. Dainese emphasizes protection and elegance in their riding gear. The Dainese Carve Master 2 jacket is frequently highlighted by experienced bikers. With its Gore-Tex construction, it guarantees waterproofing and breathability, along with CE-certified protections that enhance rider safety.

    4. Klim is synonymous with adventure touring. The Klim Badlands Pro jacket has received numerous accolades for its robust build and three-layer Gore-Tex shell, making it exceptionally durable and weather-resistant for long journeys across varying terrains.

    5. Joe Rocket is a trusted brand for affordability without sacrificing quality. The Joe Rocket Radar jacket is praised for its excellent ventilation and water-resistant features, making it ideal for daily rides or weekend adventures in unpredictable weather.

    6. Spidi produces innovative and technical riding gear. The Spidi 4Season jacket is well-regarded for its versatility and comfort, featuring a removable thermal liner and a waterproof shell, catering to both warm and cold conditions seamlessly.

    7. Harley-Davidson, known for its iconic brand, also offers robust riding jackets. The Harley-Davidson Men’s Racing Synchilla jacket provides wind and water resistance, perfect for riders who appreciate a classic look alongside modern performance features.

    These brands and models have garnered respect from seasoned riders due to their performance characteristics, making them ideal choices for all-weather riding. Riders should consider their specific needs and preferences when selecting the perfect jacket.

  • The Best Off-Road Parks in Tennessee for Motorsports Enthusiasts

    The Best Off-Road Parks in Tennessee for Motorsports Enthusiasts

    The Best Off-Road Parks in Tennessee for Motorsports Enthusiasts

    Tennessee is a treasure trove for motorsport enthusiasts, especially those who have a passion for off-roading. With its diverse terrain ranging from rugged mountains to expansive trails, the state offers a plethora of off-road parks that cater to adrenaline junkies and nature lovers alike. Adventurers will find themselves surrounded by stunning landscapes, challenging obstacles, and opportunities for camaraderie among fellow motorsport fans.

    As we explore the best off-road parks in Tennessee, we will highlight the unique features and offerings of each location. Whether you are a seasoned off-road veteran or a newcomer eager to experience the thrill of off-roading, Tennessee’s parks provide something for everyone. From exhilarating ATV trails to challenging rock crawling sections, these parks are designed to test your skills and enhance your love for motorsport.

    Join us as we delve into the top off-road parks that have become iconic in the motorsport community. Each park not only provides an escape into nature but also fosters a vibrant community where enthusiasts can share their passion, hone their skills, and create unforgettable memories. Prepare for an exhilarating journey through Tennessee’s off-road wonders!

    Top Trails for ATVs and UTVs in Tennessee

    Tennessee boasts an exciting range of trails specifically designed for ATV and UTV enthusiasts. Whether you’re seeking rugged terrain or scenic views, the state has something to offer for every riding style.

    The Royal Blue Wildlife Management Area is a premier destination, featuring over 600 miles of trails catering to various skill levels. The intricate network allows riders to navigate through stunning forested landscapes, with options for both leisurely explorations and adrenaline-pumping adventures.

    Another highlight is the Windrock Park in Oliver Springs. Spanning over 73,000 acres, it provides over 300 miles of trails with varying degrees of difficulty. From rocky climbs to smooth pathways, Windrock Park also offers breathtaking views and challenging obstacles, making it a favorite among experienced riders.

    The Holly Ridge Off-Road Park near Cookeville is an excellent choice for those wanting to experience both ATVs and UTVs. This park offers diverse trails that cater to families and thrill-seekers alike, with a mix of open fields, wooded paths, and natural obstacles to conquer.

    Close to the North Carolina border, the Buffalo Mountain State Park features trails that weave through picturesque landscapes. Riders can enjoy the tranquility of nature while navigating paths that range in difficulty, ideal for a day of exploration.

    Lastly, the Tennessee Off-Highway Vehicle Park located in Morris Chapel is an ideal location for beginners and advanced riders. With over 40 miles of trails, it offers designated areas for both ATVs and UTVs, ensuring a safe and enjoyable riding experience.

    Each of these parks offers unique features and trail conditions, catering to a variety of skill levels and preferences. Riders in Tennessee will find no shortage of adventure across the state’s diverse terrain.

    Must-Visit Off-Road Parks with Camping Facilities

    Tennessee offers a variety of thrilling off-road parks that not only provide exhilarating trails for motorsport enthusiasts but also include excellent camping facilities. Below are some must-visit off-road parks where you can enjoy both adventure and the great outdoors.

    Off-Road Park Location Camping Facilities Trail Types
    Windrock Park Oliver Springs, TN Primitive camping, RV sites with electric and water hookups Technical trails, rock crawling, and scenic routes
    Adventure Off Road Park South Pittsburg, TN Tent camping, cabins available, showers and restrooms Mixed terrain, mud, and hill climbs
    Royal Blue Wildlife Management Area Huntsville, TN Campgrounds, some with picnic tables and fire rings Family-friendly trails, challenging paths
    Trail of Tears Off-Road Park Paragould, TN Primitive camping options and shaded areas Sand, mud bogs, and hill climbs
    Shiloh Ridge Shiloh, TN Campground with restroom facilities, rustic cabins Off-road trails, scenic views, and natural features

    Each of these parks not only provides exciting trail experiences but also makes camping accessible and enjoyable. With various amenities, you can extend your adventure and immerse yourself in Tennessee’s beautiful landscapes.

    Family-Friendly Off-Road Parks with Kid Activities

    Tennessee offers a variety of off-road parks that cater not only to motorsport enthusiasts but also to families looking for a fun day out. These parks often have dedicated areas for children, making them great destinations for family-friendly adventures.

    One standout is Windrock Park, located near Oliver Springs. This expansive park provides miles of trails for different skill levels, but what truly makes it family-friendly are its kid-specific activities. Children can enjoy designated play areas featuring zip lines, playgrounds, and picnic spots, ensuring they have plenty of entertainment while adults explore the rugged terrain.

    Another fantastic option is Lone Mountain Off-Road Park, situated in the heart of the Tennessee mountain ranges. This park not only has challenging off-road trails but also includes family-friendly amenities such as a fishing pond and a small petting zoo. Kids can safely ride ATVs in controlled areas while enjoying the natural beauty that surrounds them.

    Brimstone Recreation is also worth mentioning. This park offers a well-rounded experience with its array of outdoor activities. Families can participate in guided trail rides, and the park often hosts family events that include fun competitions and games for children. The emphasis on safety and supervision means that kids can enjoy the thrill of off-roading in a secure environment.

    For families interested in a more hands-on experience, Outlaw Off-Road Park provides opportunities for children to learn about off-road vehicles through educational programs and workshops. Safety is a priority, and kids can engage in activities like ATV riding under the supervision of trained staff.

    Overall, Tennessee’s off-road parks continue to evolve, adding features and activities that make them inviting destinations for families. Each location offers a unique experience that blends motorsport excitement with child-friendly activities, ensuring an enjoyable outing for all members of the family.

    How to Prepare Your Vehicle for Off-Roading in Tennessee

    Preparing your vehicle for off-roading in Tennessee is crucial to ensure a safe and enjoyable adventure. Start by assessing your vehicle’s specifications. Make sure it has adequate ground clearance and is suited for the type of terrain you will encounter, such as muddy paths, rocky trails, or steep inclines.

    Next, inspect your tires. Ensure they are appropriate for off-road conditions; consider using all-terrain or mud-terrain tires for better traction. Check the tire pressure and make adjustments as necessary, keeping in mind that lower pressures can enhance grip on uneven surfaces.

    Perform a thorough inspection of your vehicle’s fluid levels, including engine oil, coolant, transmission fluid, and brake fluid. Refill or replace any low or contaminated fluids to avoid mechanical failures during your trip.

    Upgrade your vehicle’s suspension system if necessary. A robust suspension can help absorb shocks and maintain stability on rough terrain. Look into skid plates to protect vulnerable parts of your undercarriage from rocks and debris.

    Ensure your battery is in good condition, as off-roading can put additional strain on electrical systems. Consider adding a dual battery setup if you plan to use additional accessories like winches or lights.

    Install essential equipment, including a spare tire, jack, and basic tools for roadside repairs. Having recovery gear, such as tow straps, a winch, and traction boards, is also vital in case you get stuck.

    Lastly, pack emergency supplies, including a first aid kit, flashlight, extra food and water, and a fire extinguisher. Familiarize yourself with your route and share your plans with someone before heading out, ensuring safety throughout your off-roading experience in Tennessee.

    Seasonal Events and Competitions at Off-Road Parks

    Seasonal Events and Competitions at Off-Road Parks

    Off-road parks in Tennessee host a variety of seasonal events and competitions that attract motorsport enthusiasts from all around. These events provide an opportunity for riders and drivers to showcase their skills, connect with fellow off-road fans, and experience the thrill of competition in a variety of settings. Here are some popular events you can expect throughout the year:

    • Spring Mud Races:

      As the weather warms up, many parks organize mud racing events, where participants navigate challenging muddy tracks. These races often feature different classes, accommodating everything from stock vehicles to heavily modified machines.

    • Summer Trail Challenges:

      During the summer months, off-road parks may host trail challenges, which test participants’ navigation and driving skills. These challenges typically involve obstacle courses, steep climbs, and rocky paths, making for an exhilarating experience.

    • Fall Festival and Showdown:

      In autumn, parks often combine seasonal festivities with competition. The Fall Festival may include various events, such as vehicle shows, costume contests, and live entertainment, alongside off-road competitions that highlight driving prowess.

    • Winter Series Races:

      Some parks extend their season into winter, offering series races designed for those brave enough to tackle colder conditions. Events may feature snow and ice elements, making these races unique and challenging.

    Additionally, many off-road parks organize smaller events throughout the year, including:

    1. Charity rides and fundraisers
    2. Open practice days
    3. Rookie training camps for new off-road enthusiasts

    These seasonal events not only promote healthy competition but also foster a sense of community among off-road lovers. Participants often leave with new friendships, memories, and experience in navigating various terrains.

    Safety Tips for Off-Roading in Tennessee

    Before embarking on an off-roading adventure in Tennessee, it’s crucial to prioritize safety to ensure an enjoyable experience. Here are essential tips to consider:

    1. Wear Appropriate Gear: Always wear a helmet and protective clothing, including gloves, knee pads, and boots. These items can greatly reduce the risk of injury in case of an accident.

    2. Vehicle Inspection: Before hitting the trails, perform a thorough inspection of your vehicle. Check tire pressure, brake systems, and fluid levels. Ensure that your vehicle is equipped with proper off-road tires and functioning lights.

    3. Stay on Designated Trails: Respect the environment and local regulations by sticking to marked trails. This practice helps prevent damage to wildlife habitats and minimizes the risk of getting lost.

    4. Know the Terrain: Familiarize yourself with the specific off-road parks you plan to visit. Each park can present unique challenges, such as steep inclines, muddy paths, or rocky terrain. Understanding these can help you navigate safely.

    5. Travel in Groups: Off-roading with friends or fellow enthusiasts enhances safety. In case of an emergency, having others around can be invaluable for assistance and ensuring help is available if needed.

    6. Carry Essential Equipment: Always bring along a first aid kit, a fire extinguisher, spare tire, and basic tools. A recovery kit with items such as a winch or tow straps can also be crucial in challenging situations.

    7. Stay Hydrated and Nourished: Bring enough water and snacks for your trip. Dehydration and hunger can impair your judgment and reaction time, so it’s vital to stay energized and hydrated.

    8. Know Basic First Aid: Familiarize yourself with basic first aid procedures to manage minor injuries. In an off-road setting, knowing how to treat cuts, sprains, or shock can be lifesaving.

    9. Comply with Local Regulations: Each off-road park may have specific rules or regulations, including speed limits or vehicle restrictions. Make sure to thoroughly read and follow these guidelines to avoid fines or accidents.

    10. Plan for Emergencies: Have a communication plan, especially in remote areas. Carry a charged mobile phone, a GPS unit, or a satellite communicator to stay connected in case of emergencies.

    By adhering to these safety tips, off-roading enthusiasts can enjoy the beautiful landscapes of Tennessee while minimizing risks and promoting a safer environment for everyone involved.

  • The Best Brake Pads for High-Performance Motorcycles

    The Best Brake Pads for High-Performance Motorcycles

    The Best Brake Pads for High-Performance Motorcycles

    When it comes to motorcycle safety and performance, the importance of high-quality brake pads cannot be overstated. They play a crucial role in ensuring effective braking, allowing riders to maintain control and confidence on the road. With various types of brake pads available, selecting the right option for your motorcycle can significantly enhance its braking performance and overall ride quality.

    High-performance brake pads are designed specifically for motorcycles that demand superior stopping power under challenging conditions. Whether you are a casual rider or a seasoned racer, understanding the characteristics and advantages of different brake pad materials is essential for making an informed choice. From sintered metal to organic compounds, each type offers unique benefits that cater to various riding styles and environments.

    In this article, we will explore some of the top high-performance brake pads currently available on the market. We will examine their features, advantages, and suitability for different motorcycle types, empowering you to select the ideal brake pads that will elevate your riding experience. Whether you prioritize durability, heat resistance, or overall braking efficiency, this guide aims to assist you in navigating the myriad of options and finding the right fit for your machine.

    Choosing the Right Material for Your Motorcycle Brake Pads

    Selecting the appropriate material for your motorcycle brake pads is crucial for optimizing braking performance, longevity, and overall riding safety. Different materials offer varying levels of performance, heat resistance, and wear characteristics. Here are the most common materials used for motorcycle brake pads:

    • Sintered Metal:

      Sintered metal brake pads are made from a mix of metallic particles that are compressed and heated. This results in a very durable material that performs well under high heat and pressure. Key advantages include:

      • Excellent stopping power, especially in wet conditions.
      • Long lifespan, making them ideal for aggressive riding styles.
      • Less likely to fade during extended braking.
    • Organic (Non-Asbestos):

      Organic brake pads are made from a blend of fibers, resins, and fillers. They tend to produce less noise and dust compared to sintered pads. Advantages include:

      • Quieter operation, ideal for street riding.
      • Gentler on rotors, leading to less wear.
      • Good initial bite, providing effective stopping power at lower speeds.
    • Carbon-Ceramic:

      Carbon-ceramic brake pads are a premium option that combines carbon fibers with ceramic materials. This type is typically found in high-performance and racing motorcycles. Benefits include:

      • Exceptional heat resistance and performance in extreme conditions.
      • Low weight, improving overall bike performance.
      • Minimal wear on rotors, ensuring longer life for braking components.
    • Hybrid Pads:

      Hybrid brake pads combine features of both sintered and organic materials. They aim to provide balanced performance for various riding situations. Advantages include:

      • Versatile performance, suitable for both street and off-road use.
      • Compromise between durability and rotor friendliness.
      • Effective stopping power across different temperatures.

    When choosing the right material for your brake pads, consider the following factors:

    1. Riding Style: Determine whether you need pads for street commuting, touring, or track racing.
    2. Environmental Conditions: Assess your typical riding environment, including weather conditions and terrain.
    3. Bicycle Weight and Type: Heavier bikes might benefit more from the durability of sintered pads, while lighter models may not require such robustness.
    4. Noise Tolerance: Some riders prioritize noise reduction, which might lead them to organic materials.

    In summary, understanding the characteristics of different brake pad materials helps in making an informed choice that enhances your motorcycle’s performance and safety.

    How to Match Brake Pads with Your Riding Style

    Choosing the right brake pads for your motorcycle is essential for optimizing performance, safety, and comfort. Your riding style plays a significant role in determining the most suitable brake pads. Understanding the characteristics and needs of different riding styles will help you make an informed decision.

    Street Riding involves daily commuting and casual rides. For this style, organic brake pads are often favored. They provide excellent initial bite, are relatively quiet, and perform well at lower temperatures. Their gentle composition also minimizes rotor wear, making them ideal for urban settings where frequent stops are common.

    Sport Riding demands higher performance and quick response times. Here, sintered metal brake pads are recommended due to their superior heat dissipation and durability. They excel in high-speed situations, offer consistent braking power, and perform well under extreme conditions, making them perfect for track days and aggressive riding.

    Touring riders prioritize comfort and longevity. Kevlar brake pads are an excellent choice for this style. They provide a balance between performance and reduced dust production, ensuring a cleaner braking system throughout long rides. Their consistent performance over extended periods makes them suitable for heavy motorcycles and long-distance travel.

    Off-Road Riding presents unique challenges, such as mud and debris. Semi-metallic brake pads are often the best option here as they offer exceptional grip and control on varying surfaces. These pads are designed to withstand the harsher conditions of off-road environments while providing reliable stopping power.

    Ultimately, consider factors such as riding frequency, conditions, and personal preferences when selecting brake pads. Trying different types may help you refine your choices as you get more accustomed to your riding style. The right brake pads can significantly enhance your motorcycle experience, ensuring you ride with confidence and safety.

    Understanding the Importance of Heat Dissipation in Brake Pads

    Heat dissipation is a critical factor in the performance and longevity of motorcycle brake pads. When brakes are applied, kinetic energy is transformed into thermal energy, resulting in increased temperatures that can significantly affect braking efficiency and safety.

    Effective heat dissipation in brake pads provides several key advantages:

    • Reduced Brake Fade: As temperatures rise, brake performance can diminish, known as brake fade. High-performance brake pads are designed to maintain consistent performance at elevated temperatures, ensuring reliable stopping power.
    • Improved Longevity: Excessive heat can lead to premature wear of brake pads and rotors. Adequate heat dissipation helps mitigate wear, extending the lifespan of braking components.
    • Enhanced Consistency: Temperature fluctuations can cause variances in braking performance. High-quality brake pads that manage heat effectively deliver a more consistent feel under various riding conditions.
    • Increased Safety: Overheating can lead to brake failure, posing a serious risk to riders. Ensuring optimal heat management minimizes the chance of brake-related accidents.

    There are several materials and designs that play a significant role in heat dissipation:

    1. Material Composition: Brake pads made from advanced composite materials tend to handle heat better than traditional options. Ceramics and carbon-based materials are notable for their superior heat resistance.
    2. Ventilation Systems: Some brake pads feature ventilation designs that promote airflow, aiding in heat expulsion. These designs often result in improved performance during prolonged use.
    3. Heat Shielding: Certain high-performance brake pads utilize heat shields to protect sensitive components from extreme heat, ensuring reliable operation even in challenging conditions.

    In summary, understanding the importance of heat dissipation in brake pads is essential for any motorcycle enthusiast. Effective heat management not only enhances performance and safety but also contributes to the overall satisfaction and confidence while riding.

    Identifying Signs of Worn Brake Pads and When to Replace Them

    Brake pads are crucial for the safe operation of your motorcycle, and recognizing the signs of wear is essential for maintaining optimal performance and safety. Here are the key indicators that your brake pads may be worn and require replacement:

    Sign Description
    Squeaking or Squealing Noise If you hear a high-pitched squeaking sound when applying the brakes, it often indicates that the brake pads have worn down to a warning indicator designed to alert riders.
    Grinding Sound A grinding noise suggests that the brake pads are completely worn out, allowing the metal backing plate to come into contact with the rotor, potentially causing significant damage.
    Reduced Braking Performance If you experience a longer stopping distance or a mushy brake lever, it can indicate that the brake pads have worn down and are not providing adequate friction.
    Visible Wear Inspect the brake pads periodically. If the friction material is less than 1/8 inch thick, it is time for replacement. Additionally, check for uneven wear on the pads.
    Brake Warning Light Some motorcycles are equipped with a warning light on the dashboard that activates when the brake pads are worn to a certain threshold. Pay attention to this warning.

    Regular inspection of your motorcycle’s braking system is crucial for safe riding. If you notice any of these signs, it is advisable to consult a professional mechanic for an assessment and replacement to ensure your motorcycle remains in top working condition.

    Comparative Analysis of Top Brands in Motorcycle Brake Pads

    When selecting high-performance brake pads for motorcycles, understanding the strengths and weaknesses of leading brands is essential. This analysis focuses on four prominent manufacturers: Brembo, EBC Brakes, Galfer, and Nissin, comparing their offerings based on key performance metrics.

    Brembo is widely recognized for its premium quality and innovation in braking systems. Their motorcycle brake pads are engineered with advanced materials to provide exceptional stopping power and heat resistance. Brembo’s pads often feature a unique friction material that enhances performance under extreme conditions, making them ideal for sport and racing applications. However, they typically come at a higher price point, which might not appeal to all riders.

    EBC Brakes offers a diverse range of brake pads suitable for various riding styles, from casual cruising to aggressive racing. The brand is known for its dedicated manufacturing processes and the use of high-friction materials in its pads. EBC’s Greenstuff and Double-H Sintered pads are particularly noted for their excellent performance in both wet and dry conditions. The affordability of EBC pads without sacrificing quality makes them a favorite among budget-conscious riders.

    Galfer specializes in braking performance and is particularly known for its organic and semi-metallic pads. Their products are designed for improved modulation and lower noise levels, appealing to touring and cruiser enthusiasts. Galfer pads are often praised for maintaining consistent performance over extended use. Although they may lack the extreme stopping power seen in some competitors, their durability and rider comfort are significant advantages.

    Nissin is another major player in the motorcycle brake pad market, well-regarded for its OEM components used in various motorcycle manufacturers. Nissin brake pads are constructed with a focus on reliability and durability, often matched with good performance in everyday riding scenarios. They provide excellent value for riders seeking dependable and consistent braking without the frills that come with more performance-oriented pads.

    In conclusion, the choice of brake pads significantly impacts a rider’s experience. While Brembo excels in high-performance situations, EBC offers a versatile and cost-effective solution. Galfer focuses on rider comfort and noise reduction, and Nissin delivers reliability as an OEM option. Ultimately, the right choice depends on the rider’s specific needs, riding style, and budget considerations.

    Installation Tips for Optimal Performance of Brake Pads

    Installation Tips for Optimal Performance of Brake Pads

    Ensuring the optimal performance of brake pads is crucial for motorcycle safety and efficiency. Here are essential installation tips to achieve the best results:

    1. Clean the Brake Components: Before installing new brake pads, thoroughly clean the calipers, rotors, and mounting surfaces. Use a brake cleaner to remove dust, grease, and debris that can affect performance.

    2. Inspect the Brake Rotors: Check the condition of your brake rotors before installation. Look for any signs of wear, scoring, or warping. If the rotors are damaged, it’s recommended to replace them for better pad performance.

    3. Use Proper Tools: Utilize the correct tools to avoid damaging the brake components during installation. A torque wrench should be used to ensure bolts are tightened to the manufacturer’s specifications.

    4. Lubricate Sliding Parts: Apply a small amount of brake grease to the sliding surfaces of the caliper and the pad backing. This minimizes friction and prevents the pads from sticking, ensuring smooth operation.

    5. Bed in the Brake Pads: After installation, proper bedding of the new brake pads is essential. This process involves gradually increasing braking pressure to embed the pad material onto the rotor, enhancing overall braking performance.

    6. Check Alignment: Ensure that the brake pads are properly aligned within the caliper. Misalignment can lead to uneven wear and reduced braking efficiency.

    7. Monitor Performance: After installation, pay attention to how the brakes feel during the first few rides. Listen for unusual noises and check for any signs of vibration. If issues arise, re-inspect the installation.

    8. Regular Maintenance: Maintain your braking system by regularly checking pad wear and replacing them as needed. Keeping your brakes in top condition is vital for safety and performance.

    By following these tips, you can enhance the performance of your motorcycle’s brake pads, ensuring safer rides and a longer lifespan for your braking system.

  • The Difference Between 2-Stroke and 4-Stroke Dirt Bikes

    The Difference Between 2-Stroke and 4-Stroke Dirt Bikes

    The Difference Between 2-Stroke and 4-Stroke Dirt Bikes

    Dirt biking enthusiasts often find themselves at a crossroads when choosing between 2-stroke and 4-stroke bikes. Each type comes with its own set of advantages and challenges, making the selection process crucial for optimal riding experiences. Understanding the fundamental differences between these two engine types is essential for both novice riders and seasoned veterans looking to enhance their performance on the trail.

    2-stroke dirt bikes are known for their simplicity and lightweight design. They typically have a more compact engine configuration, which results in quicker acceleration and a more aggressive powerband. However, this comes at the cost of increased fuel consumption and higher emissions. Riders who prefer a snappy, high-revving experience may find the 2-stroke engine to be an exhilarating option.

    In contrast, 4-stroke dirt bikes offer a smoother power delivery and often feature better torque at lower RPMs. This makes them more suitable for trails and varied terrains. While they tend to be heavier and more complex mechanically, 4-stroke bikes generally provide better fuel efficiency and longer intervals between maintenance. This reliability can be a significant advantage for riders seeking long-term performance.

    Ultimately, the choice between a 2-stroke and 4-stroke dirt bike hinges on personal preferences, riding style, and the specific conditions in which the bike will be used. Each engine type has its own unique characteristics that cater to different riders’ needs, making it vital to assess these factors before making a purchase decision.

    Engine Design: Understanding the Mechanics

    The engine design is a pivotal element that differentiates 2-stroke and 4-stroke dirt bikes, impacting their performance, maintenance, and overall riding experience. Understanding the mechanics behind these engines provides insight into their operational characteristics and suitability for various riding conditions.

    2-stroke engines complete a power cycle in just two strokes of the piston, effectively combining the intake, compression, power, and exhaust strokes into one fluid motion. This design allows for a simpler construction with fewer moving parts, resulting in a lighter and more compact engine. The absence of valves is replaced by ports, which facilitate the intake and exhaust processes directly as the piston moves.

    In contrast, 4-stroke engines require four strokes of the piston to complete a power cycle. This encompasses intake, compression, power, and exhaust strokes, necessitating a more complex mechanism that includes valves, camshafts, and additional components. This design contributes to a more efficient combustion process, yielding better fuel economy and lower emissions compared to 2-stroke engines.

    Feature 2-Stroke Engine 4-Stroke Engine
    Power Cycle 2 strokes 4 strokes
    Components Simpler, fewer parts More complex, includes valves
    Weight Lighter Heavier
    Torque Delivery Immediate and high Smoother and broader range
    Fuel Efficiency Generally lower Higher
    Maintenance More frequent Less frequent

    In summary, the engine design of dirt bikes fundamentally influences their nature and suitability. 2-stroke engines favor power and simplicity, making them ideal for off-road racing, while 4-stroke engines enhance efficiency and durability, catering to longer rides and varied terrains. Each engine type has its own set of advantages, making the choice crucial depending on the rider’s needs.

    Power Delivery: Comparing Acceleration and Torque

    The power delivery characteristics of 2-stroke and 4-stroke dirt bikes significantly influence their performance and riding experience. Understanding the differences in acceleration and torque is essential for riders choosing the ideal bike for their needs.

    2-Stroke Engines typically provide a rapid and aggressive power delivery. They deliver maximum power at a higher RPM, resulting in explosive acceleration. This power band enables quick bursts of speed, making 2-stroke bikes particularly effective for racing or technical trail riding where immediate throttle response is crucial. However, this can lead to a peaky power curve, requiring the rider to stay within a specific RPM range to maintain optimal performance.

    On the other hand, 4-Stroke Engines offer a more linear power delivery, characterized by smoother acceleration. The torque produced by a 4-stroke engine is available across a broader RPM range, making it easier for riders to manage power, especially in challenging terrain. This consistent torque allows for better control during climbs and technical sections, as the rider can throttle up without the risk of losing traction.

    In terms of acceleration, 2-stroke bikes excel on short, fast tracks. Their snappier throttle response translates to faster launches. However, 4-stroke bikes shine in prolonged acceleration scenarios, where their torque allows for stronger pull through the power band, making them more suitable for longer and endurance-focused rides.

    Ultimately, the choice between a 2-stroke and a 4-stroke dirt bike depends on the rider’s preference and intended use. Those who value quick acceleration and a lightweight feel may lean toward 2-strokes, while those who prioritize stability, control, and versatility often prefer the steadiness of 4-strokes.

    Maintenance Requirements: What to Expect from Each Type

    When it comes to dirt bikes, understanding the maintenance requirements for 2-stroke and 4-stroke engines can greatly affect ownership experience. Each type has its own unique needs, which riders should consider when making a choice. Below are the key differences in maintenance requirements for both types of dirt bikes:

    • 2-Stroke Dirt Bikes:

      1. Oil Mixing: Requires premixing fuel and oil before filling the tank. The ratio depends on the manufacturer’s specifications, usually ranging from 32:1 to 50:1.

      2. Frequent Maintenance: Generally require more frequent maintenance checks. Regular checks on the spark plug, air filter, and piston are essential.

      3. Piston and Ring Replacement: Need piston and ring replacements approximately every 40 to 50 hours of riding, depending on usage and tuning.

      4. Simple Carburetor Care: While straightforward, carburetor tuning can be sensitive to changes in altitude and temperature, necessitating attention.

    • 4-Stroke Dirt Bikes:

      1. Oil Changes: Requires regular oil changes, typically every 15 to 20 hours, along with replacing the oil filter to maintain engine health.

      2. Valve Adjustments: Periodically need valve clearance adjustments, usually every 20 to 40 hours, which can be more complex.

      3. More Comprehensive Maintenance: Demand detailed maintenance checks on components such as the timing chain, camshaft, and other engine parts.

      4. Air Filter Maintenance: Air filters need more frequent servicing and cleaning, as the engine components are more sensitive to dirt and debris.

    In summary, 2-stroke dirt bikes generally require more frequent and simpler maintenance, while 4-stroke models demand comprehensive care and regular oil changes. Riders should weigh these differences when considering their riding style and maintenance capabilities.

    Weight Considerations: How Engine Type Affects Handling

    The weight of a dirt bike significantly influences its handling characteristics, and the engine type plays a crucial role in this aspect. Two-stroke engines are generally lighter than their four-stroke counterparts. This weight difference often results in enhanced maneuverability for two-stroke bikes, allowing riders to make quick turns and adjustments with relative ease. The lighter frame combined with the engine’s responsive power delivery contributes to a more agile ride, making two-stroke bikes particularly popular among motocross and trail riders seeking dynamic performance.

    On the other hand, four-stroke engines tend to be heavier due to their more complex design, which includes additional components such as valves and timing chains. This increased weight can lead to a more stable feel in straight-line speed but may also result in a less nimble bike when navigating tight trails or tricky terrain. The accumulated weight can affect the bike’s center of gravity, influencing how it corners and responds to rider input. Riders who prioritize stability often favor four-stroke bikes; however, they may need to exert more effort for quick directional changes.

    Additionally, the distribution of weight between the front and rear of the bike can vary between these two engine types. Two-stroke bikes commonly have a more centralized weight distribution, which can enhance front-end feel and feedback during aggressive maneuvers. Conversely, four-stroke bikes may exhibit a rear-biased weight distribution, resulting in different handling dynamics, particularly during braking and turning.

    Ultimately, the choice between a two-stroke and a four-stroke dirt bike should factor in the rider’s skill level, riding style, and the types of terrain they frequent. It’s essential for riders to test both engine types to understand how the weight differences affect their handling preferences, ensuring an optimal riding experience.

    Fuel Economy: Analyzing Cost and Efficiency

    When comparing 2-stroke and 4-stroke dirt bikes, one of the most significant factors to consider is fuel economy. This aspect not only affects overall operational costs but also impacts the riding experience and environmental considerations.

    2-Stroke Engines are known for their simplicity and lightweight design, but they generally have poorer fuel efficiency compared to their 4-stroke counterparts. 2-stroke bikes consume a mix of oil and fuel, which can deplete their fuel tanks quickly, especially during aggressive riding. Riders may find themselves refueling more frequently, leading to increased costs over time.

    On the other hand, 4-Stroke Engines benefit from a more complex design that allows for better fuel efficiency. They have a dedicated lubrication system that doesn’t require oil to be mixed with fuel, resulting in more economical fuel consumption. This translates into longer rides between fill-ups, making 4-stroke bikes a more budget-friendly choice for those who plan extended trips or frequent trail rides.

    In terms of cost per mile, 4-stroke dirt bikes usually offer a more favorable fuel economy, leading to reduced spending on fuel over time. Additionally, while 2-stroke engines may have a lower initial purchase price, their higher fuel consumption and the cost of mixing oil can add up quickly, making them less economical in the long run.

    Furthermore, environmental considerations also play a role. 2-stroke engines produce higher emissions due to incomplete combustion and oil burning, which may lead to additional costs related to potential environmental regulations and restrictions. Conversely, 4-stroke engines tend to have lower emissions, aligning better with increasing environmental standards and making them a more sustainable choice for eco-conscious riders.

    In conclusion, when analyzing fuel economy, 4-stroke dirt bikes generally outperform 2-stroke models in terms of efficiency, operational costs, and environmental impact. Riders should carefully consider these factors based on their riding style and intended use to make an informed decision.

    Riding Experience: Preferences for Trails vs. Tracks

    The choice between trails and tracks significantly impacts the riding experience for dirt bike enthusiasts. Each environment presents unique challenges and advantages that cater to different preferences and skill levels.

    Trail Riding

    Trail Riding

    Trail riding is characterized by natural terrains, often including varied obstacles like rocks, roots, and muddy patches. The following points illustrate why many riders prefer trails:

    • Natural Terrain: Trails offer a connection with nature, providing scenic views and a sense of adventure.
    • Variety of Challenges: Riders encounter diverse obstacles that require different riding techniques, enhancing skill development.
    • Less Predictability: Trails often change with weather conditions, providing an element of surprise and excitement.
    • Longer Rides: Trails can be extensive, allowing for longer riding sessions without repetitive laps.

    However, trail riding does come with considerations:

    • Safety Concerns: The natural environment may hide hazards and requires caution.
    • Limited Space: Overgrown areas can restrict width and speed, affecting ride flow.

    Track Riding

    Track riding, on the other hand, takes place in a controlled environment designed for dirt bikes. Here are some attractive aspects of riding on tracks:

    • Controlled Environment: Tracks provide predictable surfaces and layouts, increasing rider confidence.
    • Skill Development: Tracks often feature jumps, berms, and whoops, offering focused opportunities to hone specific skills.
    • Community:** Tracks usually attract a community of riders, fostering a social atmosphere and sharing of techniques and experiences.
    • Events and Competitions: Tracks are often the site of organized races and practice sessions, presenting chances for riders to compete and improve.

    Nonetheless, track riding has its disadvantages:

    • Repetitiveness: The same layout can become monotonous after repeated laps.
    • Accessibility: Tracks may require travel to specific locations, limiting spontaneous riding opportunities.

    Conclusion

    Ultimately, the choice between trail and track riding boils down to personal preferences. Trail riding may appeal to those seeking adventure and unpredictability, while track riding suits individuals looking for skill refinement and community interaction. Understanding these differences can enhance the overall dirt biking experience, ensuring that riders can choose the environment that fits their style best.

  • How to Store Your Jet Ski Properly for the Winter

    How to Store Your Jet Ski Properly for the Winter

    How to Store Your Jet Ski Properly for the Winter

    As the winter season approaches, it is crucial for jet ski owners to consider the proper steps for storage. Ensuring that your watercraft is well-protected from harsh weather conditions can significantly extend its lifespan and maintain its performance. A jet ski, like any other vehicle, requires special attention during the off-season to prevent damage from freezing temperatures, moisture, and debris.

    Storing your jet ski correctly not only safeguards the engine and exterior parts but also prevents costly repairs that may arise from neglect. By following a systematic approach to winterizing your jet ski, you can enjoy peace of mind knowing that your investment is secure until the next riding season. This article will guide you through the essential steps needed to prepare your jet ski for winter storage, ensuring it remains in optimal condition.

    From cleaning and draining systems to choosing the right storage location, each step plays a vital role in your jet ski’s winter protection process. The following sections will detail these critical actions, providing you with a comprehensive understanding of how to effectively store your jet ski during the colder months.

    Choose the Right Storage Location for Your Jet Ski

    Finding the ideal storage location for your jet ski is crucial for ensuring its longevity and performance. First and foremost, consider a climate-controlled environment. Humidity and temperature fluctuations can lead to corrosion and damage. A garage or a dedicated storage facility that maintains steady conditions is preferable.

    If indoor storage is not an option, look for a covered outdoor space. This could be a shed or a carport that shields your jet ski from direct sunlight and harsh weather elements. Make sure the area is also secure to prevent theft or vandalism.

    Another important factor is accessibility. Choose a location that allows easy access, especially when it comes time to prepare your jet ski for summer. Avoid locations that are too far away or difficult to navigate, as this can lead to inconvenience and wear on your watercraft.

    Be mindful of drainage issues as well. Water accumulation around your storage area can lead to mold and mildew, which can damage your jet ski. Proper drainage can help maintain a dry environment, further protecting your investment.

    Lastly, ensure that the location has ample space. Storing your jet ski properly away from other vehicles or equipment can prevent accidental damage. A designated area where it can be stored upright or on a trailer is ideal, allowing for easy maintenance and inspection throughout the winter months.

    Clean and Maintain Your Jet Ski Before Storage

    Before storing your jet ski for the winter, thorough cleaning and maintenance are essential to ensure its longevity and performance. Start by rinsing the entire body with fresh water to eliminate salt, dirt, and grime. Use a gentle soap made specifically for marine vehicles to remove tough stains without damaging the finish.

    Next, pay particular attention to the hull. Inspect for scratches or damage, and apply a suitable wax to protect the surface during storage. This wax acts as a barrier against moisture and contaminants.

    After cleaning the exterior, focus on the interior components. Flush the cooling system with fresh water to remove any debris and prevent corrosion. Be sure to check the oil levels and replace the oil and filter if necessary, as contaminants can circulate and damage the engine over time.

    Additionally, remove any fuel left in the tank. Adding a fuel stabilizer can prevent varnish buildup in the fuel system. Run the engine for a few minutes to ensure the stabilizer reaches the entire system.

    Don’t forget about the battery. Disconnect it and clean the terminals to avoid corrosion. Store the battery in a cool, dry place, ensuring it’s charged and ready for the next season.

    Finally, cover your jet ski with a breathable cover to shield it from dust and moisture while allowing ventilation. Taking these steps will help maintain your jet ski’s performance and appearance for years to come.

    Drain All Fluids and Prepare the Engine

    Preparing your jet ski for winter storage involves proper maintenance of the engine and its fluids. This process ensures that your craft remains in good condition and is ready for use in the next season. Follow these steps to drain all fluids and prepare the engine effectively.

    Start by draining the fuel system. Old fuel can cause engine problems, so it is crucial to remove any remaining gasoline. Run the engine until it stalls to consume most of the fuel, and then use a siphon to remove any remaining gasoline from the tank.

    Next, drain the oil from the engine. This step is vital as old oil can accumulate contaminants that may lead to engine damage. Make sure to follow the manufacturer’s guidelines for oil removal.

    After draining the oil, replace it with fresh oil as per the recommended specifications. This helps protect the engine’s internals during the winter months. When you fill the engine with fresh oil, run it for a few minutes to circulate the new oil throughout the system.

    Additionally, the coolant should be drained if your jet ski has a closed cooling system. This prevents freezing and cracking in the engine block during frigid temperatures. Refer to your owner’s manual for the proper procedure to drain the coolant.

    Finally, consider adding a fogging oil to the engine. Fogging oil coats the internal surfaces and provides a protective barrier against moisture and corrosion during storage. Spray it directly into the carburetor or spark plug holes while the engine is running.

    Step Action Notes
    1 Drain fuel system Run the engine until it stalls, then siphon remaining fuel.
    2 Drain engine oil Remove all old oil and replace with fresh oil.
    3 Drain coolant Prevent freezing; refer to owner’s manual for guidance.
    4 Add fogging oil Spray into carburetor/spark plug holes while the engine runs.

    By following these steps to drain all fluids and prepare the engine, you significantly reduce the risk of damage during the winter months. Proper maintenance now will ensure a smoother operational start when the boating season resumes.

    Protect Your Jet Ski with a Quality Cover

    One of the most effective ways to safeguard your jet ski during the winter months is by investing in a high-quality cover. A good cover serves as a barrier against harsh weather conditions, preventing snow, ice, and rain from accumulating on your watercraft.

    When selecting a cover, choose one that is specifically designed for your jet ski model. A tailored fit ensures maximum protection and prevents moisture from entering, reducing the risk of mold and mildew formation. Additionally, covers made from durable materials like marine-grade fabric provide UV resistance and can withstand extreme temperatures.

    Proper ventilation is also crucial. A cover with ventilation features helps to circulate air, preventing stagnant moisture buildup that can lead to corrosion and damage over time. Look for covers with reinforced seams and straps to ensure they remain securely in place, even during strong winds.

    Don’t forget to consider the ease of use. A cover that is simple to put on and take off can save you time and effort, especially during cold winter months. Some models even come with storage bags, making it convenient to store the cover when not in use.

    Using a quality cover not only protects your jet ski but also helps maintain its value. Regularly covering your jet ski can minimize the wear and tear associated with prolonged exposure to the elements, resulting in fewer repairs and a longer lifespan for your investment.

    Safeguard Your Battery and Electrical Components

    Protecting your jet ski’s battery and electrical systems is essential for ensuring optimal performance when the season resumes. Start by removing the battery from the jet ski. Store it in a cool, dry place to prevent damage from extreme temperatures.

    Before storing the battery, clean the terminals using a solution of baking soda and water to eliminate corrosion. Rinse with clean water and dry completely. Once cleaned, apply a thin layer of petroleum jelly on the terminals to protect against future corrosion.

    Consider using a battery maintainer or trickle charger to keep the battery charged during the winter months. This helps prolong battery life and ensures it’s ready for immediate use when spring arrives. Periodically check the battery’s voltage level during storage to confirm it remains within optimal ranges.

    Next, secure all electrical connections within the jet ski. Inspect wiring for any signs of wear or damage, and replace any frayed or cracked wires. Disconnect any additional electrical components that could draw power while the jet ski is in storage.

    Covering the jet ski with a breathable cover can protect against humidity and dust, which can harm electrical components over time. Ensure the cover allows for ventilation to minimize moisture buildup.

    Finally, consult your owner’s manual for specific recommendations regarding electrical system care during winter storage, as manufacturer guidelines can provide valuable insights tailored to your model.

    Inspect and Secure Accessories and Gear

    Inspect and Secure Accessories and Gear

    Preparing your jet ski for winter requires more than just storing the watercraft itself; it’s essential to examine and secure all accessories and gear that accompany it. Ensuring these items are in good condition will facilitate a smoother experience when you reclaim your jet ski in the spring.

    Start by inspecting each component of your gear:

    1. Life jackets:
      • Check for tears, fraying, or any damage.
      • Ensure all straps and buckles are functional.
      • Store them in a dry place to prevent mildew.
    2. Tow ropes:
      • Examine for wear and cuts.
      • Verify the strength and functionality of knots.
      • Store in a cool, dry environment to avoid degradation.
    3. Fenders:
      • Inspect for punctures or cracks.
      • Clean to remove any dirt or debris.
      • Deflate for winter storage if applicable.
    4. Anchor and hardware:
      • Check for rust or corrosion.
      • Lubricate moving parts to prevent seizing.
      • Store securely to avoid loss.
    5. Safety equipment:
      • Verify signal flares and other safety tools are not expired.
      • Replace any missing items.
      • Organize everything in a dedicated bag for easy access.

    After inspecting everything, proceed to secure your accessories:

    • Store items in clearly labeled bins or boxes to avoid confusion in the future.
    • Consider using a locking mechanism for valuable items to prevent theft during the off-season.
    • Keep all accessories dry and away from potential moisture to avoid mold and decay.

    Taking the time to properly inspect and secure your jet ski accessories and gear will prolong their lifespan, ensure safety, and save you money on replacements in the long run.

  • How to Choose the Best Snowmobile for Your Needs

    How to Choose the Best Snowmobile for Your Needs

    How to Choose the Best Snowmobile for Your Needs

    When it comes to navigating winter landscapes, selecting the right snowmobile is crucial for both safety and enjoyment. With numerous models available, it can be overwhelming to find the one that aligns with your specific requirements. Understanding the various aspects of snowmobiles, including their engine performance, weight, and intended use, is essential for making an informed decision.

    Snowmobiling is not just a recreational activity; it’s also an opportunity to explore the outdoors in pristine conditions. Whether you’re interested in leisurely rides on groomed trails or tackling challenging backcountry terrains, the snowmobile you choose will significantly impact your experience. The key is to assess your riding style and preferences before diving into the market.

    In this article, we’ll delve into the critical factors to consider when choosing a snowmobile. From engine size and utility to brand reputation and customer reviews, we will break down the essential characteristics that will help you find a snowmobile that meets your unique needs. This guide aims to simplify your selection process and ensure that your next snowmobiling adventure is both thrilling and enjoyable.

    Assessing Your Riding Style and Terrain Preferences

    Evaluating your riding style and the types of terrain you plan to navigate is crucial when selecting the right snowmobile. Different models are designed for specific purposes, and understanding your preferences can help you make an informed choice. Here are some key aspects to consider:

    Riding Style Description Recommended Snowmobile Type
    Recreational Riding Casual rides on groomed trails. Focus on comfort and ease of handling. Trail Snowmobiles
    Performance Riding High-speed riding with a focus on power and agility. Suitable for experienced riders. Performance Snowmobiles
    Off-Trail Riding Exploring backcountry and deep snow. Requires a snowmobile with good flotation and maneuverability. Mountain Snowmobiles
    Utility Riding Used for work or transport in remote areas. Needs durability and towing capacity. Utility Snowmobiles
    Long-Distance Touring Extended rides requiring comfort and storage for gear. Prioritizes a smooth ride. Touring Snowmobiles

    In addition to riding style, the terrain you’ll primarily traverse plays a significant role in your snowmobile selection. Factors such as snow depth, types of trails, and landscape challenges must be examined. Take the following into account:

    Terrain Type Description Recommended Snowmobile Features
    Groomed Trails Well-maintained paths suitable for casual riding and speed. Narrower track width, lightweight, high fuel efficiency
    Deep Powder Off-trail riding through deep snow with varying conditions. Wide track, lightweight, high horsepower for flotation
    Moguls Challenging uneven terrain requiring stability and control. Suspension systems for shock absorption, medium track width
    Technical Terrain Includes steep slopes, trees, and potential obstacles. Agile handling, strong engine braking, and lightweight design

    By carefully assessing both your riding style and the types of terrain you plan to explore, you will ensure that your snowmobile provides the best performance, safety, and enjoyment tailored to your unique needs.

    Understanding Different Types of Snowmobiles

    Choosing a snowmobile requires a clear understanding of the different types available, as each is designed for specific riding styles and conditions. Here is an overview of the main categories:

    Trail Snowmobiles: Designed primarily for groomed trails, trail snowmobiles offer a balance of speed and comfort. They typically have narrower skis and a longer track, providing stability and maneuverability on packed surfaces. These models often come equipped with higher-performance engines to handle longer distances and diverse trail conditions.

    Mountain Snowmobiles: Built for off-trail riding and climbing steep terrains, mountain snowmobiles feature lightweight designs, deep snow tracks, and powerful engines. The skis are wider for improved flotation, and they often include a shorter track length to facilitate turning in deep powder. These models are ideal for riders who enjoy backcountry adventures.

    Crossover Snowmobiles: Crossover models blend characteristics of trail and mountain snowmobiles, making them versatile for various terrains. They feature mid-range track lengths and a balanced design, allowing riders to navigate both groomed trails and off-trail terrains. This versatility makes them popular among riders looking to explore different landscapes.

    Utility Snowmobiles: Tailored for work and heavy-duty use, utility snowmobiles are equipped to haul supplies, pull sleds, or perform tasks in snowy conditions. They often feature a more robust frame and a longer track for better stability when carrying loads. These models prioritize function over speed, making them suitable for farming or search-and-rescue operations in snow-covered areas.

    Performance Snowmobiles: Performance models are aimed at those who prioritize speed and agility. They are equipped with high-output engines, lightweight materials, and advanced suspension systems that enhance responsiveness. While they excel in speed on groomed trails, they may not perform as well in deep snow, so riders should consider their primary use before selecting this type.

    Understanding these categories allows potential buyers to identify which type of snowmobile aligns best with their intended use, ensuring a more enjoyable and suitable riding experience.

    Evaluating Key Features for Comfort and Performance

    Evaluating Key Features for Comfort and Performance

    When selecting a snowmobile, it’s crucial to assess several key features that directly impact both comfort and performance. Understanding these elements ensures that you choose a model suited to your specific riding style and terrain conditions.

    • Suspension System: A well-designed suspension system absorbs shocks and enhances stability. Look for adjustable suspensions that allow you to modify settings based on weight and riding conditions.
    • Seat Comfort: The seat’s design, padding, and ergonomics influence your riding experience. Opt for snowmobiles with contoured seats that provide sufficient support for long rides.
    • Handlebar Adjustment: Adjustable handlebars enable you to customize your riding position. Ensure the snowmobile offers settings that help maintain a comfortable posture, especially during extended use.
    • Wind Protection: A good windscreen can significantly enhance comfort by protecting you from the cold wind and elements. Consider the height and design of the windscreen that complements your average riding speed and style.
    • Weight Distribution: The snowmobile’s weight affects maneuverability and handling. Look for models with a balanced weight distribution to ensure optimal performance and stability on varied terrains.

    When evaluating performance features, consider the following:

    • Engine Power: The engine’s horsepower and torque determine speed and acceleration. Choose an engine that matches your riding requirements, whether for trail riding or backcountry adventures.
    • Track and Ski Design: The track length and width, along with ski design, influence traction and control. A wider track provides better flotation in deep snow, while a narrower one enhances speed on trails.
    • Braking System: A reliable braking system is essential for safety and control. Evaluate disc brake systems that offer responsive and consistent stopping power.
    • Fuel Efficiency: Efficient fuel consumption allows for longer rides without frequent refueling. Look for models with advanced technology aimed at maximizing fuel economy.
    • Technology Enhancements: Modern snowmobiles may include features such as GPS navigation, heated grips, and performance monitoring systems, enhancing overall ride experience and safety.

    Ultimately, the ideal snowmobile balances comfort and performance based on your unique needs. Conduct thorough research, test models where possible, and consult with experienced riders to make an informed decision.

    Budget Considerations: New vs. Used Snowmobiles

    When diving into the snowmobile market, one of the first considerations should be your budget. The choice between new and used snowmobiles can significantly impact your financial planning and overall satisfaction with your purchase.

    New snowmobiles often come with the latest technology, warranty coverage, and creature comforts that may enhance your riding experience. However, they also come with a higher price tag. On average, a new snowmobile can range from $5,000 to over $15,000 depending on the model and features you desire. It’s essential to factor in additional costs such as insurance, registration, and maintenance, as these can add up quickly.

    On the other hand, used snowmobiles can provide substantial savings, often costing 30-50% less than their new counterparts. However, the condition, age, mileage, and maintenance history of a used machine can vary significantly. It’s crucial to conduct thorough research and possibly have a professional inspection to ensure you’re getting a reliable vehicle. Hidden mechanical issues could lead to unexpected expenses down the line.

    Financing options also differ between new and used snowmobiles. Many dealerships offer attractive financing terms for new models, including low-interest rates and longer repayment periods. In contrast, financing for used snowmobiles may be more limited, with higher interest rates due to perceived risk. It’s advisable to explore multiple financing avenues to find the best deal.

    Ultimately, your decision should align with your riding habits and how much you’re willing to invest. If you ride frequently and demand the latest features, a new snowmobile may justify the cost. Conversely, if you’re a casual rider or on a tight budget, a used option may be more practical. Taking time to evaluate both choices will ensure that you select a snowmobile that enhances your winter adventures without straining your finances.

    Researching Brands and Models That Fit Your Requirements

    When selecting a snowmobile, thorough research on various brands and models is crucial for ensuring that your choice aligns with your specific needs and preferences. Start by identifying what type of riding you plan to do–whether it’s mountain riding, trail riding, or utility tasks. Each category requires different characteristics in a snowmobile.

    Once you’ve established your primary use, focus on reputable brands known for quality and reliability. Major manufacturers like Ski-Doo, Polaris, Arctic Cat, and Yamaha offer a wide range of models tailored to various riding styles. Investigate the history and reputation of each brand, looking at customer reviews and service ratings. This will provide insights into their customer support, durability, and performance in real-world conditions.

    Next, compare specific models within your chosen brand that meet your needs. Analyze their specifications, such as engine size, weight, and fuel efficiency. Look for features that enhance comfort and safety, like heated grips, adjustable seats, and advanced suspension systems. Pay attention to the technology incorporated into the models, such as electronic fuel injection, which can improve performance and fuel consumption.

    Another important step is to visit local dealerships. This allows you to see the snowmobiles in person, sit on them, and assess their fit and comfort. Speak with knowledgeable staff to obtain insights and recommendations based on your requirements. Test rides can also be invaluable, providing firsthand experience of how each model handles in different conditions.

    Additionally, consider reviewing forums and online communities dedicated to snowmobiling. Engaging with seasoned riders can provide unbiased opinions and personal experiences that may inform your decision. Such platforms often discuss performance, maintenance issues, and the pros and cons of various models, helping you make a more informed choice.

    Lastly, don’t forget to factor in your budget. Determine the price range you are comfortable with and include costs for accessories, insurance, and maintenance in your calculations. Many brands offer financing options which can also be worth exploring. By following these steps, you will be well-equipped to research and choose a snowmobile that perfectly fits your unique requirements.

    Safety Features and Maintenance Tips for Longevity

    When choosing a snowmobile, prioritizing safety features is essential. Look for models equipped with electronic stability control, which helps prevent skidding and loss of control on icy surfaces. A quality braking system, such as hydraulic disc brakes, provides reliable stopping power in various conditions. Additionally, consider snowmobiles with a safety tether switch that automatically shuts off the engine if the rider falls off. Protective features like engine guards and hand guards can also mitigate injuries in accidents.

    Another important aspect is visibility. Opt for snowmobiles with bright LED headlights and reflective surfaces to enhance visibility during low-light conditions. Safety gear is equally critical; always wear a helmet with a visor, and protective clothing that includes gloves and boots designed for harsh winter weather.

    Regular maintenance is vital for ensuring the longevity of your snowmobile. Follow the manufacturer’s maintenance schedule, which typically includes oil changes, filter replacements, and inspections of the fuel and coolant systems. Pay close attention to the track and skis; regularly check for wear and proper tension. Keeping the track clean from snow and ice build-up is crucial for performance and safety.

    Battery care should not be overlooked. Ensure connections are clean and tight, and charge the battery during the off-season to prevent deterioration. Additionally, store your snowmobile in a dry, temperature-controlled environment to avoid rust and damage from moisture. A thorough inspection before each ride can help catch any potential issues early.

    Finally, familiarize yourself with the snowmobile’s manual. Understanding the specific needs and recommendations for your model promotes safe operation and longevity. By prioritizing safety features and adhering to a consistent maintenance routine, you can enjoy your snowmobile for many seasons to come.

  • How to Choose the Best Dirt Bike for Your Riding Style

    How to Choose the Best Dirt Bike for Your Riding Style

    How to Choose the Best Dirt Bike for Your Riding Style

    When it comes to off-road adventures, selecting the perfect dirt bike is crucial for an enjoyable and safe riding experience. With a plethora of options available on the market, understanding your personal riding style and requirements is essential. Whether you are a novice or a seasoned rider, the right dirt bike can significantly enhance your performance and enjoyment on the trails.

    Different types of dirt bikes cater to various riding styles, and making an informed decision involves considering several key factors. Weight, engine size, and suspension are just a few of the critical elements to evaluate. Each of these characteristics can greatly influence your handling, control, and overall experience during rides.

    Moreover, your intended use–be it racing, trail riding, or adventure biking–demands a bike that complements your skill set and preferences. In this article, we will explore the distinctive features of various dirt bike categories and how they align with different riding styles. By gaining clarity on these aspects, you’ll be better equipped to choose a dirt bike that fits not only your skills but also your personal riding aspirations.

    Understanding Different Types of Dirt Bikes

    Dirt bikes are designed for various riding styles and terrains. Understanding the different types can help you choose the right bike for your needs. Below are some common categories of dirt bikes:

    • Motocross Bikes:

      These bikes are built for racing on closed circuits. They are lightweight, have powerful engines, and feature long suspension travel to handle jumps and rough terrain. Typical engine sizes range from 125cc to 450cc.

    • Trail Bikes:

      Trail bikes are designed for casual riding on off-road trails. They prioritize comfort and versatility, often featuring a smoother power delivery and comfortable ergonomics. Engine sizes typically vary from 125cc to 450cc.

    • Enduro Bikes:

      Enduro bikes are specially designed for endurance racing. They come equipped with features that enhance performance over long distances, including a larger fuel tank and more robust suspension. Engine sizes usually range from 250cc to 500cc.

    • Dual-Sport Bikes:

      These bikes combine features of off-road and street motorcycles, allowing for both on-road and off-road riding. They are street-legal and often feature lights, mirrors, and a more comfortable seating position. Engine sizes range from 250cc to 650cc.

    • Mini Bikes:

      Mini dirt bikes cater to younger riders or beginners. They are smaller and less powerful, typically ranging from 50cc to 110cc. These bikes are ideal for learning basic riding skills.

    Each type of dirt bike is tailored for specific riding environments and skill levels. When selecting a dirt bike, consider factors such as your experience, intended use, and riding preferences to ensure the best match for your riding style.

    Assessing Your Skill Level and Experience

    Understanding your skill level and experience is crucial when choosing the right dirt bike. Beginners typically benefit from lighter, more manageable bikes that are designed for ease of use and comfort. These models usually feature lower seat heights, less powerful engines, and simpler controls. Examples include 125cc or smaller bikes, which are ideal for newer riders to develop their skills.

    As your skills grow and you become more confident, you may want to transition to a mid-range bike, typically ranging from 125cc to 250cc. These bikes offer more power and improved suspension, allowing for enhanced performance on varied terrain. Riders with some experience will appreciate the balance between control and speed, making it a suitable choice for trail riding and motocross.

    Experienced riders often prefer higher displacement bikes, from 250cc to 450cc, which cater to aggressive riding styles and challenging terrains. These bikes offer advanced technology, better suspension systems, and greater power. However, they require a higher skill level to manage effectively, emphasizing the importance of assessing your capabilities before making a purchase.

    Additionally, it’s important to consider the type of riding you plan to do. If you aim to participate in competitive events, a bike designed for racing might be more suitable, while casual riders may prefer a dual-sport or enduro model. Evaluating your experience and specific riding goals will help to ensure you select a bike that complements your abilities and enhances your riding experience.

    Matching Bike Features to Your Riding Terrain

    Understanding the terrain in which you plan to ride is crucial for selecting the right dirt bike. Different surfaces and environments require specific bike features to enhance performance, safety, and enjoyment.

    For sandy or loose terrains, bikes with wider tires and a lower center of gravity are ideal. Wider tires provide better flotation, preventing the bike from sinking into the sand. Additionally, bikes with more suspension travel help absorb bumps and ensure smoother rides over shifting surfaces.

    In contrast, rocky and rugged terrains benefit from bikes that feature durable frames and reinforced components. A higher ground clearance is essential to avoid damage from uneven rocks while allowing better maneuverability. Additionally, having a bike with good braking performance is vital for steep descents and narrow paths.

    If your primary riding involves trails with a mix of mud and wet conditions, opt for bikes equipped with aggressive tread patterns. These provide maximum grip and control on slippery surfaces. Look for models with a powerful engine response to navigate through challenging mud pits efficiently.

    For motocross tracks, lightweight bikes with responsive handling are preferred. The focus should be on agility, making it easier to execute jumps, turns, and quick maneuvers. A bike with adjustable suspension settings will allow you to fine-tune your ride based on track conditions.

    Lastly, consider your level of experience and riding style. Beginners may benefit from bikes with user-friendly features like automatic clutches or lower power outputs to help build confidence. Advanced riders may look for high-performance models that offer customization options to match aggressive riding techniques.

    Ultimately, the right dirt bike should harmonize with the terrain you plan to conquer, ensuring an enjoyable and safe riding experience.

    Considering Engine Size and Performance Specifications

    Considering Engine Size and Performance Specifications

    When selecting a dirt bike, engine size is a fundamental factor influencing performance, handling, and overall riding experience. Engine size is typically measured in cubic centimeters (cc), and it plays a crucial role in determining the bike’s power output and suitability for different riding styles.

    Engine sizes typically range from 50cc for beginners and youth bikes to over 450cc for advanced and experienced riders. Smaller engines provide lower power and torque, making them ideal for novice riders who are still mastering their skills. In contrast, larger engines deliver higher horsepower, offering the speed and acceleration required for competitive racing or aggressive trail riding.

    Performance specifications, such as horsepower and torque, further determine a dirt bike’s capabilities. Horsepower indicates how quickly a bike can reach speed, while torque reflects the engine’s pulling power at lower RPMs. For riders who plan to tackle steep hills or rugged terrain, a bike with higher torque will be advantageous. Conversely, those focusing on speed in flat tracks may prioritize horsepower.

    Below is a comparison table that outlines the typical performance characteristics of different engine sizes:

    Engine Size (cc) Rider Level Typical Horsepower Typical Torque Ideal Riding Style
    50cc Beginner 5-10 hp 4-6 lb-ft Casual riding, youth bikes
    100-125cc Intermediate 10-20 hp 7-15 lb-ft Trail riding, beginner to intermediate racers
    250cc Advanced 20-40 hp 15-25 lb-ft Cross-country riding, competitive racing
    450cc+ Expert 40+ hp 25-35 lb-ft Professional racing, aggressive trail riding

    Ultimately, choosing the right engine size and understanding performance specifications is critical to matching a dirt bike with your riding style. Consider your skill level, the terrain you will be riding on, and your performance expectations when making a decision. This thoughtful approach will enhance your riding experience and ensure you select a bike that suits your needs effectively.

    Evaluating Comfort and Fit for Long Rides

    Choosing a dirt bike that offers optimal comfort and fit is crucial for long rides, as it directly impacts your overall riding experience and endurance. When evaluating a motorcycle, consider the seat height and width. A seat that is too high can make it difficult to maintain proper control, while a narrow seat may lead to discomfort during extended travels. Try different bikes to find a seat that allows you to maintain a relaxed posture with both feet comfortably on the ground when stopped.

    The ergonomic layout of the handlebars and foot pegs also plays a significant role in comfort. Make sure the handlebars are positioned at an appropriate height and allow for natural wrist positioning. The foot pegs should be placed so that your knees can maintain a slight bend, reducing fatigue during long sessions. Adjustability in these components can further enhance fit and comfort based on your personal preference.

    Wear gear that complements your dirt bike. Well-fitted riding gear, including pads and boots, can significantly improve comfort levels. Consider the material of the seat as well; softer seats are generally more comfortable but can cause issues during aggressive riding by allowing the rider to sink too deep, affecting control. Conversely, firmer seats provide better support but may not be the best for prolonged riding without breaks.

    Additionally, take into account the bike’s suspension system. A good suspension setup absorbs shocks effectively, minimizing the impact on your body, and improving comfort on rough terrains. Make sure to test ride the bike over various surfaces to evaluate its performance and comfort over longer distances.

    Finally, assess the weight of the dirt bike. A lighter bike is typically easier to handle over long rides and less taxing to maneuver. Balance this with power and stability. The right bike should provide you with the necessary control while ensuring that you feel comfortable operating it for extended periods without undue strain or fatigue.

    Budgeting for Maintenance and Upgrades

    Choosing a dirt bike is just the beginning of your riding journey; proper budgeting for maintenance and upgrades is crucial to maximize your investment and enhance your riding experience. Regular maintenance ensures that your bike remains in optimal condition, and timely upgrades can significantly improve performance and safety.

    Regular Maintenance Costs

    Maintenance costs can vary based on the bike’s make and model, but certain expenses are common across all dirt bikes. Routine tasks such as oil changes, air filter replacements, and brake inspections are essential. Budgeting around $200 to $500 annually for basic maintenance on a mid-range bike is a reasonable estimate. However, if you ride frequently or in challenging conditions, this figure may increase. Additionally, tire replacements can add another $100 to $300 annually, depending on the quality and brand.

    Upgrades for Performance

    Your riding style will dictate the types of upgrades necessary to enhance your bike’s performance. Whether it’s suspension upgrades, exhaust modification, or engine tuning, allocate funds for these improvements. A basic suspension upgrade can cost between $300 and $1,200, while a new exhaust system typically ranges from $200 to $600. Each upgrade affects your bike’s handling and overall performance, so choose wisely based on your needs.

    Unexpected Repairs

    Even with careful maintenance, unexpected repairs can arise. Mechanical failures or accidents may lead to significant repair costs. It’s wise to set aside a separate emergency fund of at least $500 to cover unanticipated issues. This will help you avoid financial strain during urgent repairs, allowing you to keep your bike in riding condition without delay.

    Conclusion

    Budgeting for maintenance and upgrades is essential for any dirt bike rider. A proactive approach to both routine maintenance and potential upgrades not only enhances the longevity of your bike but also elevates your overall riding experience. By planning your finances accordingly, you can ensure that you are prepared for both predictable and unexpected costs, paving the way for a successful riding journey.

  • Essential Off-Roading Gear for Safety & Performance

    Essential Off-Roading Gear for Safety & Performance

    Essential Off-Roading Gear for Safety & Performance

    Venturing off the beaten path offers exhilarating experiences for adventure enthusiasts, but it also comes with its unique challenges. To navigate rugged terrains confidently and safely, having the right gear is essential. The right off-road equipment not only enhances your performance but also ensures your safety during unpredictable situations. This guide explores the top off-road gear you should consider before hitting the trails.

    One of the fundamental aspects of off-roading is ensuring that you are well-prepared for any potential hazards. Investing in quality safety gear such as helmets, gloves, and eye protection can make all the difference when faced with rough conditions. Additionally, a well-equipped vehicle with modifications tailored for off-road challenges, including enhanced suspension systems and durable tires, is crucial for performance.

    Besides protective equipment, having the right tools and recovery gear is vital. Items like winches, tow straps, and portable air compressors can be lifesavers when stuck or dealing with vehicle malfunctions. This article will delve deep into each category of essential off-road gear, providing insights on how to choose the best options for your adventure needs.

    Choosing the Right Tires for Various Terrains

    Selecting the appropriate tires for off-road driving is vital for maximizing both safety and performance. Different terrains pose unique challenges, and specific tire types are designed to enhance traction, stability, and control under those conditions.

    For rocky terrains, such as boulders or gravel, consider using tires with reinforced sidewalls and a rugged tread pattern. These features protect against punctures and provide the grip needed to navigate sharp edges and uneven surfaces. Tires with a wider footprint can also help distribute weight more evenly, reducing the risk of getting stuck.

    When tackling muddy conditions, opt for tires with deep, aggressive treads. The larger lugs help to channel mud away from the contact patch, ensuring better traction. Additionally, self-cleaning properties within the tread design can prevent the build-up of mud, maintaining grip and control as you drive.

    In sandy environments, such as beaches or deserts, tires designed specifically for sand are essential. These tires usually have a larger surface area and a lower air pressure, which helps prevent sinking into the sand. The tread pattern is also less aggressive, allowing for smoother gliding over loose surfaces.

    For snow and icy conditions, winter tires featuring specialized rubber compounds and deep grooves are crucial. Their design enables better grip on slippery surfaces and helps prevent sliding. Studded tires can further enhance traction in extreme conditions, making it easier to navigate through heavy snow or ice.

    Combining different tire types within a multi-terrain vehicle can offer versatility, allowing you to switch between tires based on specific driving conditions. Always keep in mind the load rating and speed capabilities of the tires you choose, as these factors are critical for safe off-road performance.

    Essential Safety Equipment for Off-Road Adventures

    When embarking on off-road adventures, prioritizing safety is crucial. The right safety equipment can make a significant difference in ensuring a secure and enjoyable experience. Here are some essential items to consider:

    Helmet: A high-quality helmet protects your head from impacts. Choose a full-face or off-road helmet designed to absorb shocks, with ventilation for comfort during long rides.

    Protective Clothing: Invest in durable, abrasion-resistant clothing specifically designed for off-road activities. This includes padded jackets, trousers, and gloves that provide protection from scrapes and weather conditions.

    Gloves: Off-road gloves enhance grip and protect your hands from blisters and injuries. Opt for gloves with reinforced padding and good dexterity for optimum control.

    Goggles: Protect your eyes from dirt, debris, and UV rays with durable goggles. A good pair should offer a wide field of vision and fit comfortably with your helmet.

    First Aid Kit: Carry a comprehensive first aid kit equipped with bandages, antiseptics, and necessary medications. Familiarize yourself with its contents and ensure it is easily accessible in case of emergencies.

    Signal and Communication Devices: Equip yourself with a whistle, flashlight, or emergency beacon to signal for help if needed. Communication devices like two-way radios or satellite phones are essential for staying connected in remote areas.

    Fire Extinguisher: A fire extinguisher should be part of your off-road gear, especially if you are traveling in areas prone to wildfires. Familiarize yourself with how to use it properly.

    Tire Repair Kit: Flat tires can be common in off-road terrains. A tire repair kit, including a pump, patches, and plug tools, can help you quickly address any issues and continue your adventure.

    Navigation Tools: GPS devices or off-road maps are important for staying on course. Ensure you have a method to navigate safely, and always carry a backup in case of technology failure.

    By equipping yourself with these essential safety items, you can enhance your off-road experience and reduce the risk of accidents, ensuring a fun and safe adventure.

    Upgrading Suspension Systems for Enhanced Stability

    When navigating rough terrain, a robust suspension system is crucial for maintaining vehicle stability and performance. Upgrading your suspension allows for improved handling, weight distribution, and overall control, making it an essential modification for off-road enthusiasts.

    One effective method to enhance stability is by installing performance shock absorbers. These components help to dampen the impact from uneven surfaces, reducing body roll and ensuring better tire contact with the ground. Look for shocks specifically designed for off-road applications, which often feature increased damping capacity and adjustable settings for various terrains.

    Adding heavy-duty coil springs or leaf springs can also significantly improve stability. Upgraded springs provide better load support and maintain optimal ride height, preventing bottoming out during challenging driving conditions. Additionally, consider installing a suspension lift kit to increase ground clearance, allowing for better maneuverability over obstacles while improving approach and departure angles.

    Stabilizer bars are another critical enhancement. By reducing body sway during cornering, these bars keep the vehicle more level, enhancing driver confidence and passenger comfort. For serious off-road enthusiasts, aftermarket sway bar disconnects can be beneficial, allowing for increased articulation on challenging trails.

    Lastly, remember to ensure proper alignment after any suspension upgrade. A well-aligned suspension not only improves stability but also maximizes tire lifespan and ensures optimal performance. Investing in a quality suspension system upgrade can make all the difference in off-road adventures, balancing safety and performance effectively.

    Navigation Tools to Avoid Getting Lost in the Wild

    When venturing off-road, reliable navigation tools are essential to ensure safety and prevent getting lost in unfamiliar terrains. Here are some crucial tools you should consider for effective navigation.

    First and foremost, a high-quality GPS device is indispensable. Modern GPS units designed for outdoor use provide accurate positioning and detailed topographic maps. They often come with features like route planning, waypoint marking, and tracking capabilities, ensuring you stay on course even in dense forests or remote areas.

    Moreover, smartphone applications can serve as powerful navigation aids. Apps like Gaia GPS, AllTrails, and Google Maps allow users to download maps for offline use. Ensure your phone is equipped with a rugged case and a portable charger to withstand outdoor conditions. Signal may be limited, so preload essential maps before setting off.

    A traditional yet effective tool is the compass. Understanding how to read a compass in conjunction with a map can provide a fail-safe navigation method when technical devices fail. Compasses are lightweight, durable, and require no power–making them ideal for long expeditions.

    Physical maps are another critical resource. Carrying a detailed topographic map of your destination allows you to visualize trails, terrain changes, and water sources. Map skills, such as reading contour lines and understanding symbols, can be invaluable in guiding your journey.

    Additionally, some off-road enthusiasts opt for navigation radios or satellite communicators. These devices can provide continuous location tracking and allow communication with others even in areas with no cell service. This can be crucial for emergencies.

    Lastly, a backup navigation strategy is vital. Prepare for the unexpected by practicing route-finding skills and regularly checking your position. Establish a plan to retrace your steps if necessary, and always inform someone of your intended route before you head out.

    Protective Clothing: Balancing Comfort and Safety

    Protective Clothing: Balancing Comfort and Safety

    When engaging in off-road activities, protective clothing plays a crucial role in ensuring both safety and comfort. The right gear not only safeguards against injuries but also allows for freedom of movement, which is vital for performance. Here are key considerations when selecting protective clothing for off-road adventures.

    • Material: The fabric of protective clothing should be durable, abrasion-resistant, and breathable. Common materials include:
      • Nylon: Known for its strength and lightweight properties.
      • Kevlar: Offers exceptional resistance to cuts and abrasions.
      • Mesh panels: Enhance ventilation for comfort during intense activities.
    • Fit: A good fit is essential for both safety and comfort. Clothing that is too loose can get caught on obstacles, while overly tight gear can restrict movement. Look for options with adjustable features such as:
      • Elastic waistbands
      • Velcro straps
      • Adjustable cuffs
    • Padding and Protection: Choose clothing with built-in padding in key areas like elbows, knees, and back to provide extra protection without sacrificing mobility. Consider specific items:
      • Protective jackets with armor
      • Padded pants or shorts
      • Impact-resistant gloves
    • Weather Resistance: Off-road conditions can vary greatly, so it’s important to select clothing that protects against the elements. Features to look for include:
      • Waterproof or water-resistant materials
      • Windproof layers
      • Insulation for colder climates
    • Visibility: In many off-road situations, being visible can prevent accidents. Opt for clothing in bright colors or those with reflective elements to enhance visibility in low-light conditions.

    By carefully balancing comfort and safety, off-road enthusiasts can enjoy their adventures without compromising their protection. Investing in quality protective clothing not only helps to prevent injuries but also enhances overall performance in various terrains.

    Maintenance Tools Every Off-Roader Should Carry

    When embarking on off-road adventures, having the right maintenance tools can make a critical difference in ensuring safety and performance. Here are essential tools that every off-roader should carry.

    1. Tire Repair Kit: A tire repair kit is indispensable for handling punctures and flat tires. It should include tire plugs, a reamer, and a T-handle insertion tool. Knowing how to use this kit can save you from being stranded in remote areas.

    2. Jumper Cables: A set of high-quality jumper cables can be a lifesaver when your vehicle’s battery fails. Ensure they are long enough to reach another vehicle and carry a pair with sufficient gauge to handle the load of larger off-road vehicles.

    3. Multi-Tool: A versatile multi-tool can cover a wide range of needs. Look for one that includes pliers, screwdrivers, and a knife. This handy tool can assist in quick fixes without requiring a bulky toolkit.

    4. Portable Air Compressor: A portable air compressor allows you to adjust tire pressure according to terrain conditions. Lowering tire pressure can enhance traction on sand or mud, while reinflating them is crucial for highway travel.

    5. Wrench Set: A comprehensive set of wrenches is critical for making adjustments to various components, from the suspension to the axles. Ensure it includes both metric and standard sizes to accommodate different vehicle models.

    6. Socket Set: A quality socket set will help you tackle engine and drivetrain issues. Choose a set with deep sockets to reach bolts in confined spaces, and include both ratchets and extensions for ease of use.

    7. First Aid Kit: While not a mechanical tool, a well-stocked first aid kit is essential for safety. Include bandages, antiseptic wipes, pain relief, and any personal medications. Preparedness in emergencies can make a significant difference.

    8. Flashlight: A durable, bright flashlight is crucial for night repairs. Look for one with a long battery life and multiple settings, as it can assist in various situations, from changing a tire to assessing engine troubles in low light.

    9. Shovel: A compact, foldable shovel is useful for digging out stuck vehicles. A sturdy, lightweight shovel can help create traction or clear a path in muddy and snowy conditions.

    10. Tow Straps: Heavy-duty tow straps are necessary for vehicle recovery. Ensure they have a high weight rating and are made of durable materials to handle the demands of off-road recovery situations.

    By equipping your vehicle with these maintenance tools, you can enhance both safety and performance during your off-road excursions, ensuring you’re prepared for any challenges that may arise on the trail.

  • How to Improve Your Motorcycle’s Suspension for a Smoother Ride

    How to Improve Your Motorcycle’s Suspension for a Smoother Ride

    How to Improve Your Motorcycle’s Suspension for a Smoother Ride

    Motorcycle suspension plays a critical role in delivering a comfortable and controlled riding experience. Whether you’re navigating through city streets or tearing up a winding mountain road, the quality of your suspension directly affects your performance and enjoyment. A well-tuned suspension can significantly enhance handling, stability, and overall ride quality, offering riders a superior experience.

    Many riders often overlook the importance of suspension maintenance and upgrades, focusing instead on visual modifications or engine performance. However, investing time and resources into improving your motorcycle suspension can yield incredible benefits. By adjusting or upgrading components like forks, shocks, and linkages, you can tailor your bike’s reaction to the road, allowing for a smoother and more predictable ride.

    In this article, we will explore essential tips and techniques for enhancing your motorcycle suspension. From basic adjustments to advanced modifications, we will provide you with a roadmap to achieve the optimal setup for your specific riding style. Get ready to dive into the world of suspension tuning, and discover how a few strategic improvements can transform your ride.

    Understanding Suspension Types and Their Impact on Comfort

    Motorcycle suspension systems play a crucial role in determining ride quality and overall comfort. There are primarily two types of suspension systems used in motorcycles: traditional telescopic forks for the front and various configurations for the rear, including dual shock absorbers and mono-shock systems. Each type offers distinct advantages and can significantly influence handling, stability, and comfort.

    Traditional telescopic forks are widely used in motorcycles. They consist of two metal tubes that guide the front wheel’s movement. This type of suspension provides a balance between comfort and sportiness. The fork’s spring and damping setup can absorb bumps, resulting in improved ride quality on uneven surfaces. However, overly stiff settings can lead to a harsh ride, especially on rough roads.

    In contrast, rear suspension systems can vary greatly. Dual shock absorbers are common on cruiser and touring bikes. This setup allows for more comfort, as each shock can independently react to obstacles, providing better traction and absorbing shocks effectively. On the other hand, mono-shock systems, often found on sport bikes, offer more agility and precise handling at higher speeds, though they may sacrifice some comfort on rough terrain.

    Another important factor is the adjustment capability of the suspension. Many modern motorcycles come equipped with adjustable suspension settings. By tuning the preload, rebound, and compression dampening, riders can customize their setup based on personal preferences and riding conditions. Properly adjusted suspension enhances comfort by allowing the bike to perform optimally under various loads and terrains.

    Ultimately, understanding the type of suspension on your motorcycle can greatly enhance your riding experience. Riders should consider their typical riding conditions and style when selecting a motorcycle or adjusting its suspension. A well-tuned suspension not only improves comfort but also increases safety and control, making for a more enjoyable ride.

    How to Choose the Right Components for Your Motorcycle

    How to Choose the Right Components for Your Motorcycle

    Selecting the appropriate components for your motorcycle is essential in achieving optimal suspension performance and a smoother ride. Begin by determining your riding style–whether it’s commuting, touring, or off-road–to identify the specific needs of your setup. This will inform your choice of components, including forks, shocks, and springs.

    When choosing forks, consider factors such as travel length, damping characteristics, and material. Longer travel forks typically provide better bump absorption, which is crucial for uneven terrains. Look for forks with adjustable compression and rebound damping to fine-tune performance based on your weight and riding conditions.

    Shocks are equally important; select ones that match your motorcycle’s weight and intended use. Look for features like external adjustability and different spring rates. Adjustable shocks allow for increased personalization, letting you cater the ride to satisfy comfort or performance preferences. Ensure that the shock has a suitable load capacity to handle your weight and any additional gear.

    Springs play a key role in suspension setup. Pay attention to the spring rate, which influences how the bike handles and responds. Choosing a spring that matches your weight ensures that your motorcycle sits at the correct ride height and provides adequate support. Consider both the front and rear spring rates to maintain balance throughout your bike.

    Additionally, take into account the quality and type of materials used in the construction of components. High-quality aluminum or titanium can reduce weight while enhancing durability. Avoid cheap alternatives that can compromise safety and performance.

    Lastly, consulting with experts or utilizing tuning guides can help align your choices with your motorcycle’s specific requirements. Balancing the right components not only improves ride quality but also enhances control and stability for a more enjoyable experience on two wheels.

    Tuning Your Suspension Settings for Different Riding Conditions

    Adjusting your motorcycle’s suspension settings is essential for maximizing comfort and performance across varying riding conditions. The suspension plays a crucial role in handling, stability, and overall ride quality. Here are guidelines for tuning your suspension based on specific environments.

    For urban riding, where potholes and uneven surfaces are common, opting for a softer suspension setup is beneficial. Decrease the compression damping to allow the fork and shock to absorb bumps more effectively. This adjustment can help prevent jarring impacts that can lead to rider fatigue over time. Likewise, increasing the preload will ensure that the bike maintains its balance while navigating through traffic.

    On winding, twisty roads, a stiffer suspension setup enhances cornering performance. Increase the compression damping to minimize the bike’s tendency to dive during hard braking and lean into turns. Adjusting the rebound damping ensures the wheels return quickly to their original position after compression, maintaining traction and stability. Additionally, fine-tuning the preload can help keep your bike’s alignment consistent through the corners.

    When riding off-road, the suspension settings must adapt to handle rough terrains, such as rocks and mud. Lowering the preload allows for more suspension travel, which helps to absorb larger impacts. Reducing both compression and rebound damping enables the suspension to respond more quickly to variations in surface conditions. This setup allows the tires to remain in contact with the ground, improving traction and control.

    For long-distance touring, comfort is paramount. A softer suspension setting can help reduce rider fatigue over extended rides. Increase preload slightly to maintain stability at higher speeds while keeping the compression damping softer to absorb road irregularities. This balance ensures a smoother ride over long distances while providing enough support to prevent bottoming out.

    It’s important to remember that these settings should be regularly adjusted based on your biking style and changes in riding conditions. Testing and fine-tuning the suspension to match your personal preferences can provide a significantly improved riding experience. Use these guidelines as a starting point and make incremental adjustments to find the perfect balance for your motorcycle.

    Regular Maintenance Practices to Enhance Suspension Performance

    Maintaining your motorcycle’s suspension is crucial for achieving optimal performance and comfort. Regular inspections and servicing can help identify potential issues before they escalate, ensuring a smoother ride.

    Begin with routine visual checks of the suspension components, including forks, shocks, and linkage systems. Look for signs of wear, such as leaking oil or rust, and ensure that all mounting hardware is secure. Any visible damage should be addressed immediately, as compromised components can severely affect ride quality.

    Next, inspect and adjust the sag settings. Sag measurement is essential for personalized suspension performance and handling. To achieve the right sag, sit on your motorcycle in riding gear and measure the distance between the rear axle and a fixed point on the chassis. Adjust preload settings as needed to reach the recommended sag for your specific bike and riding style.

    Regular cleaning is also vital. Remove dirt and debris from suspension components, as accumulated grime can hinder performance. Use a soft cloth and suitable cleaner to wipe down the forks and shocks, ensuring no particles are stuck in the seals that could lead to leaks.

    Consider changing the suspension oil periodically. Over time, oil can degrade, losing its effectiveness in damping and lubrication. Refer to your manufacturer’s guidelines for recommended intervals, typically every 10,000 miles or after a specific number of riding hours. This process often involves draining old oil and replacing it with fresh liquid that meets your motorcycle’s specifications.

    Finally, don’t overlook the importance of professional tuning. Adjustments may be necessary based on riding conditions and preferences. Suspension specialists can calibrate your setup, providing expert advice on improving handling dynamics and overall performance.

    Signs Your Suspension Needs an Upgrade or Repair

    Your motorcycle’s suspension plays a crucial role in providing a smooth ride and maintaining control. Over time, various signs can indicate that your suspension system requires attention. Recognizing these indicators early can enhance rider safety and comfort. Here are some key signs to look out for:

    Sign Description
    Excessive Bouncing If your motorcycle bounces excessively after hitting bumps or potholes, this could indicate weakened springs or dampers that are no longer functioning effectively.
    Poor Handling Difficulty in steering, swaying, or feeling unstable when cornering can suggest that your suspension system is not providing the necessary support.
    Uneven Tire Wear Inconsistent or accelerated wear patterns on your tires may be a result of improper suspension alignment or faulty components affecting the contact with the road.
    Bottoming Out If your bike frequently bottoms out, even on minor bumps, it’s indicative of insufficient damping or the need for heavier springs.
    Leaking Forks or Shocks Puddles of oil around the forks or shocks suggest that seals have failed, leading to a loss of performance and necessitating a repair or replacement.
    Increased Stopping Distance A longer stopping distance may occur if the suspension is not effectively managing weight transfer during braking, raising safety concerns.
    Unusual Noises Clunking, squeaking, or knocking sounds when riding can indicate loose components or worn bushings that should be checked.

    Regular maintenance and prompt attention to these signs can prolong the life of your motorcycle’s suspension and enhance your riding experience. If you notice any of these symptoms, consider scheduling a professional inspection to determine if an upgrade or repair is necessary.

    Exploring Aftermarket Suspension Options and Their Benefits

    Aftermarket suspension components can significantly enhance your motorcycle’s performance, comfort, and handling. Upgrading your suspension can provide better control, improved ride quality, and increased safety. Here are several aftermarket suspension options to consider:

    • Fork Upgrades:

      Replacing or modifying the front forks can greatly influence handling and stability. Options include:

      • Adjusted spring rates to match rider weight and riding style.
      • Upgraded damping systems for finer control over compression and rebound.
      • Adjustable forks for on-the-fly tuning during rides.
    • Shock Absorbers:

      Installing aftermarket shocks can improve rear-end stability and minimize bottoming out. Key benefits include:

      • Customizable spring rates based on riding style and load.
      • Improved damping characteristics for a smoother ride.
      • Height adjustability to maintain optimal geometry.
    • Complete Suspension Systems:

      Some brands offer complete suspension kits that include both forks and shocks, providing a cohesive upgrade. Benefits include:

      • Balanced performance tailored to specific models.
      • Enhanced reliability through matched components.
      • Ease of installation with harmonized settings.
    • Height Adjustable Options:

      Sets from aftermarket brands allow for height adjustments, which can be beneficial for:

      • Riders needing a more accessible seat height for stopping and maneuvering.
      • Optimizing center of gravity based on riding conditions.
      • Adapting to different loads, such as a passenger or luggage.

    The benefits of these aftermarket suspension upgrades can be summarized as follows:

    1. Improved Handling: Enhanced responsiveness and grip through better control over bumps and corners.
    2. Increased Comfort: Reduced rider fatigue with a smoother ride over all types of terrain.
    3. Customization: Tailored suspension settings allow for a personalized riding experience.
    4. Durability: High-quality materials often result in longer-lasting suspension components.
    5. Performance Enhancements: Better overall performance in various riding situations, from daily commuting to high-speed cornering.

    Investing in aftermarket suspension options not only enhances ride quality but also improves overall motorcycle performance, making it a worthwhile consideration for any serious rider.